Ticketing lab summary
The ticketing system lab provides hands-on experience with managing and resolving user-reported issues in a professional IT environment. It includes creating and tracking tickets, categorizing issues, prioritizing tasks, and documenting resolutions. Designed for beginners, the lab utilizes tools like Peppermint, demonstrating how to navigate a user-friendly interface to create new tickets, update their statuses, and close them efficiently. This lab is ideal for aspiring help desk technicians to gain practical knowledge of ticketing workflows and improve problem-solving and organizational skills.
What you will need Installed before starting this lab
- Ubuntu on a hypervisor (VMWARE, VirtualBox, etc…)
- Ubuntu installed and updated
What we will setup in this lab
1. Docker
- Purpose: Docker is a platform that allows you to containerize applications. Containers are lightweight, portable, and isolated environments that bundle an application and its dependencies, ensuring it runs consistently across different systems.
- Use in the Lab: We use Docker to deploy the Peppermint ticketing system, making it easy to manage and run in any environment.
2. Docker Compose
- Purpose: Docker Compose is a tool for defining and managing multi-container Docker applications. It uses a YAML file to configure all the application services.
- Use in the Lab: We use Docker Compose to set up the Peppermint system and its associated services (e.g., database, web application) with one command.
3. Python Virtual Environment
- Purpose: A Python virtual environment isolates dependencies for Python projects, ensuring they don’t conflict with other projects or the system’s global Python environment.
- Use in the Lab: We set up a virtual environment to run Selenium, keeping its dependencies separate from the system’s Python setup.
4. Selenium
- Purpose: Selenium is a tool for automating web browsers. It allows you to write scripts that interact with web applications like a real user (e.g., clicking buttons, filling forms).
- Use in the Lab: We use Selenium to automate testing of the Peppermint system’s web interface, ensuring it works as expected.
5. ChromeDriver (or other browser drivers)
- Purpose: ChromeDriver is a driver that acts as a bridge between Selenium and the Chrome web browser. Other drivers (e.g., GeckoDriver for Firefox) serve similar purposes.
- Use in the Lab: We use ChromeDriver to enable Selenium to control the Chrome browser for testing.
6. Peppermint
- Purpose: Peppermint is the ticketing system we’re deploying. It helps manage, track, and resolve user-reported IT issues.
- Use in the Lab: Peppermint serves as the core application for simulating a help desk environment.
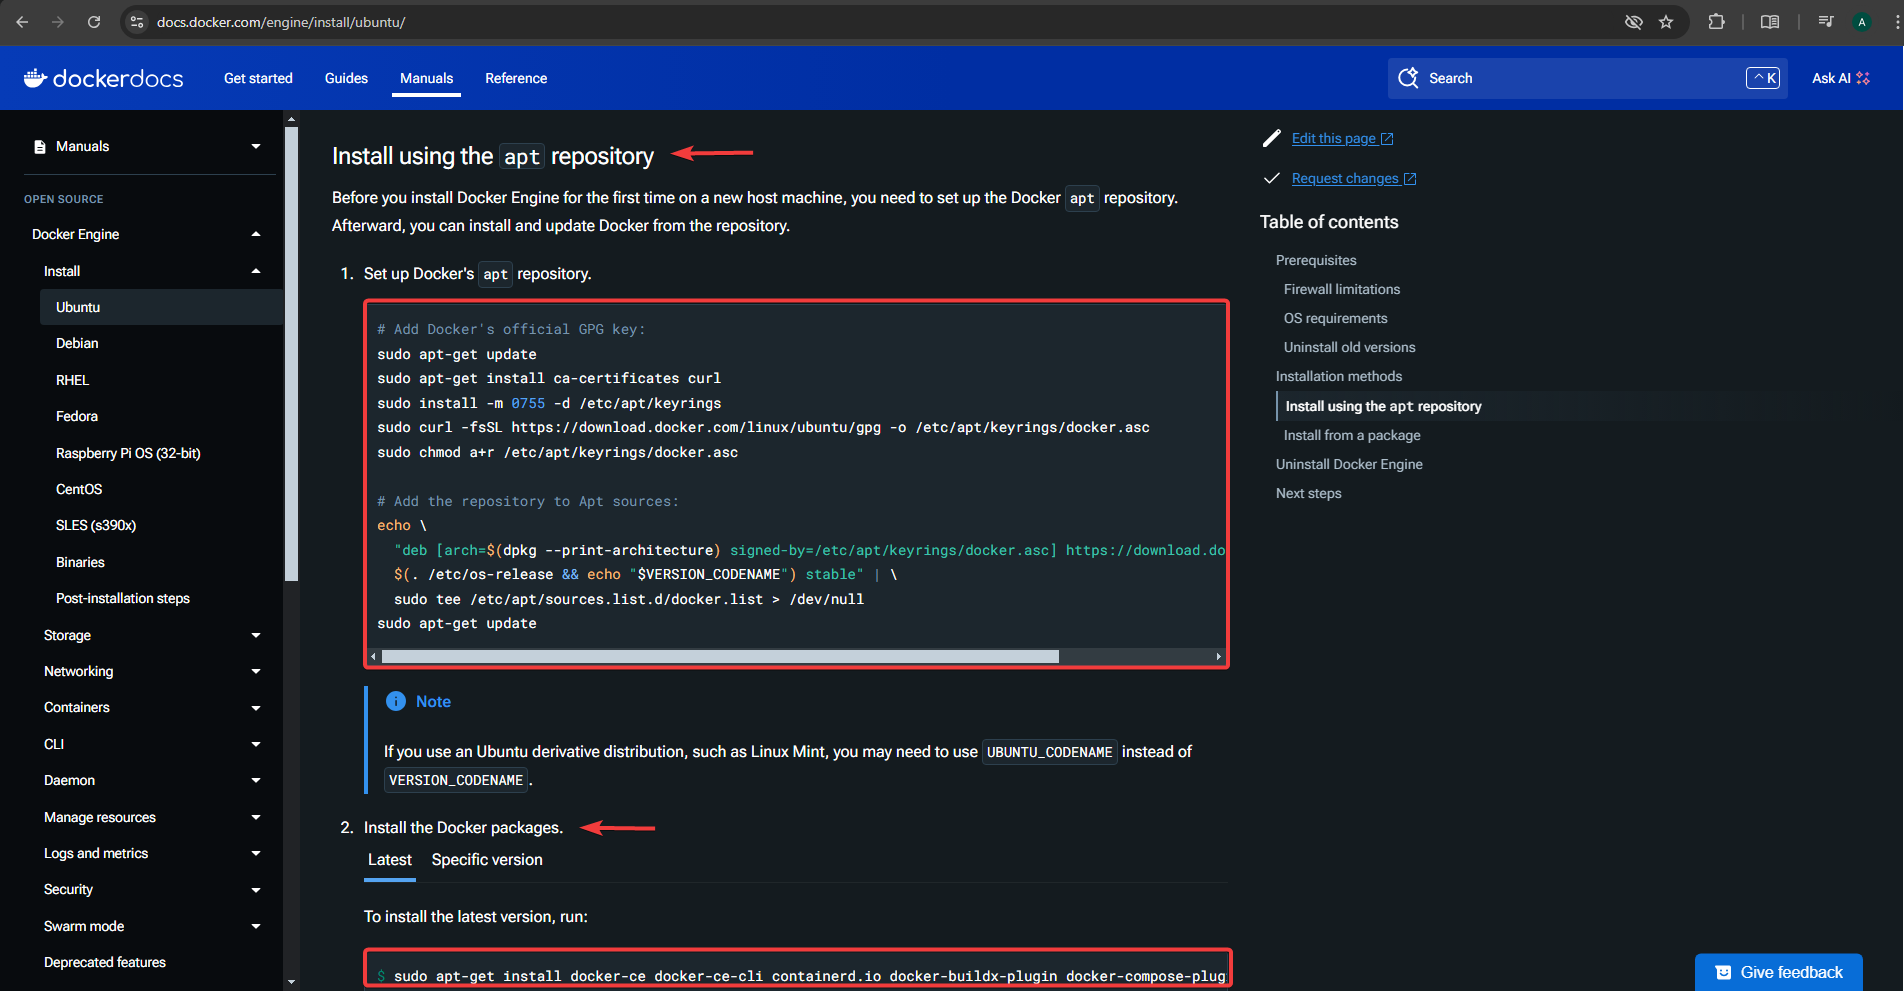
Downloading Docker through the apt repository
Follow the apt repository install – Link Here: https://docs.docker.com/engine/install/ubuntu/
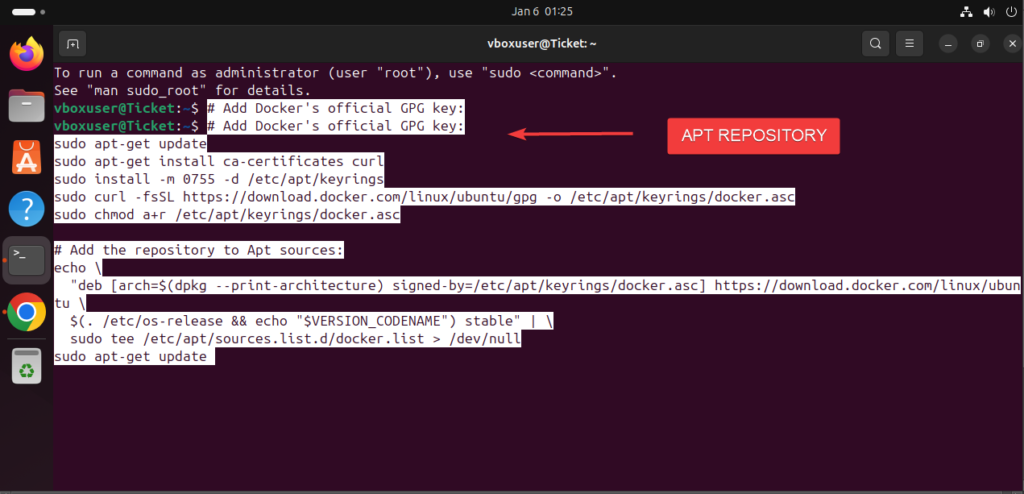
- Open a Terminal
- Paste the entire APT Repository command. Press enter to run. Put in your password and click YES on anything during the installation process.
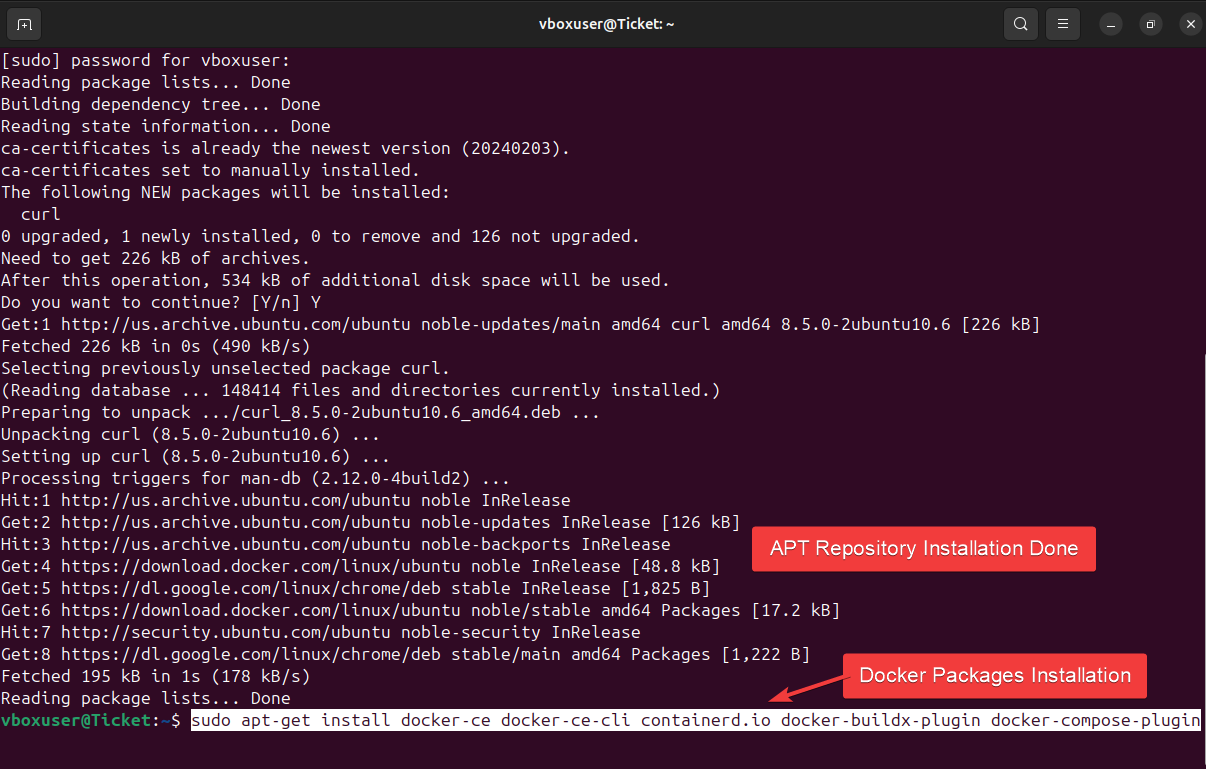
2. Install the Docker Packages
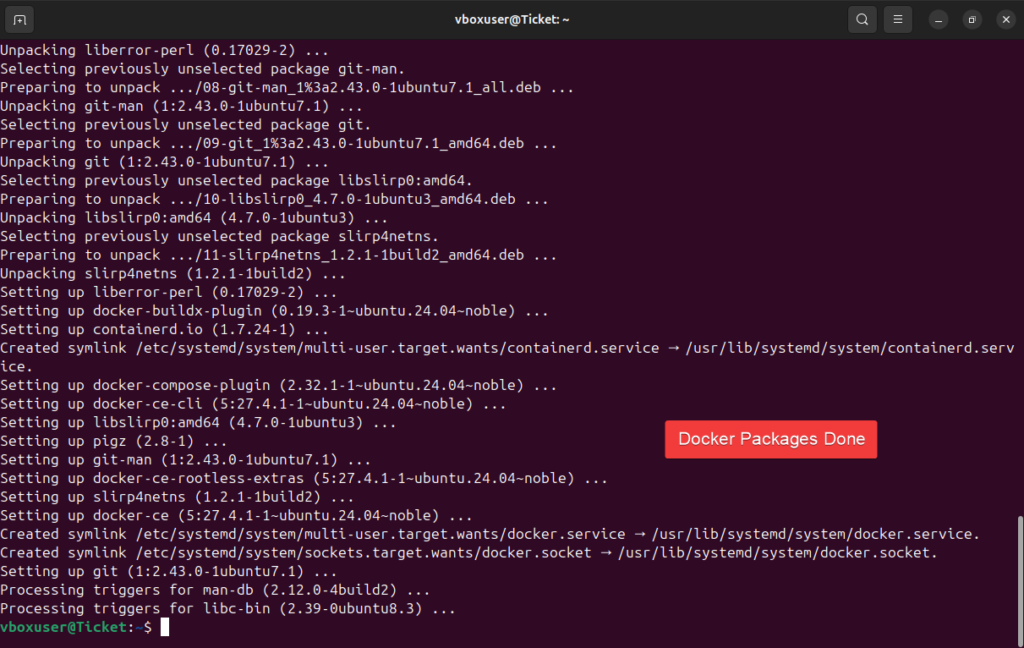
- Now, once the APT Repository Install is finished
- Copy and paste the Docker Packages command into the terminal & press ENTER
Installing Peppermint Ticketing System
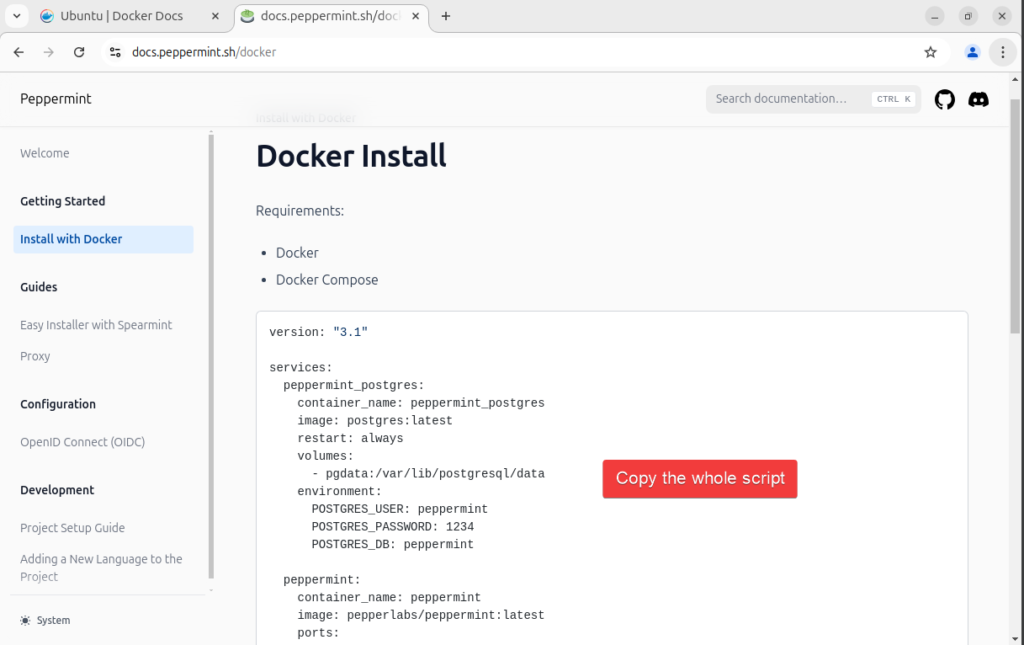
- Link Here for the script we will run and the steps: https://docs.peppermint.sh/docker
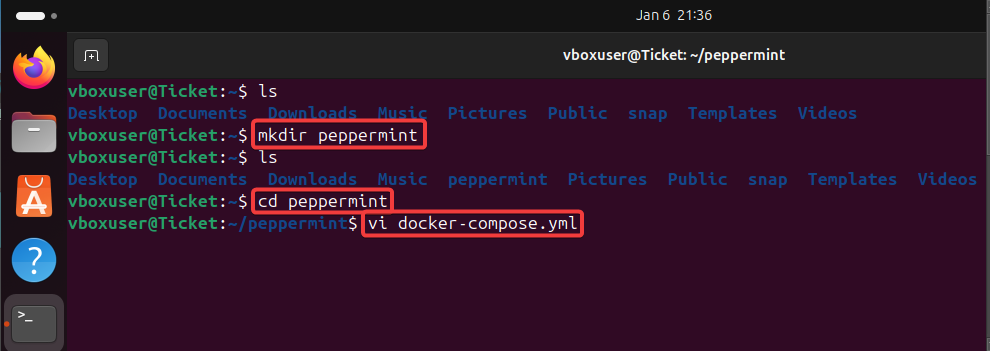
- Make a Peppermint Directory
- I will make the sub-directory (peppermint) in the Home Directory
- Command: mkdir peppermint
2. Making the .yml file
- Now go ahead and get into the peppermint directory
- Command: cd peppermint
- Use the “vi” command to create the docker-compose.yml file while also opening it so we can paste the script.
- Command: vi docker-compose.yml
- Go to the link pasted above in this section
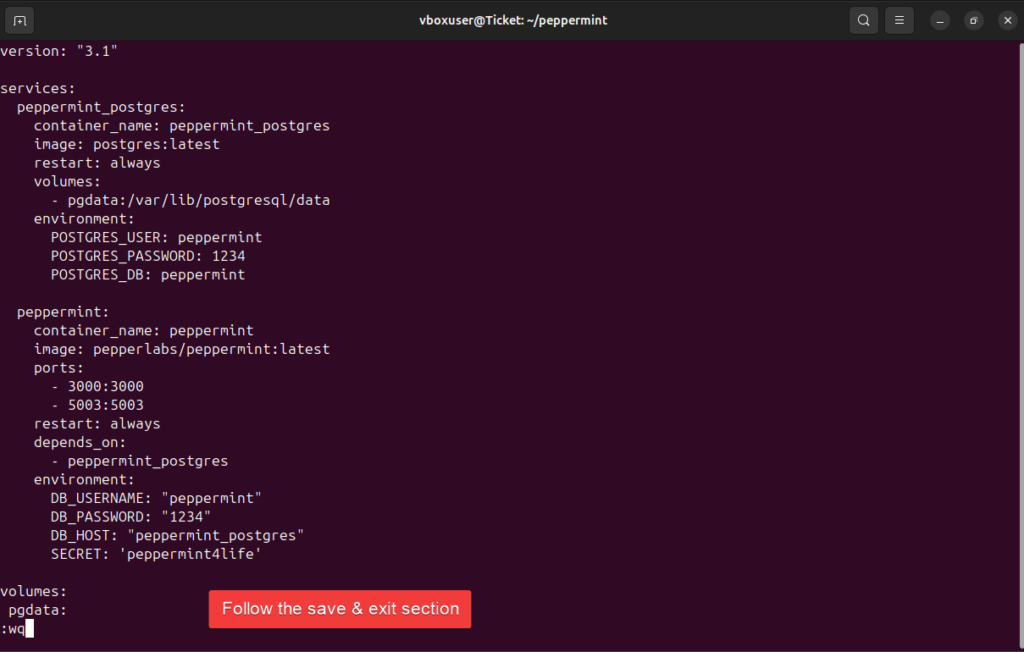
- Copy it and paste the peppermint script into the docker-compose.yml
- Use this command in the terminal to paste: CTRL+ SHIFT+ V
- Go ahead and exit the insert
- How to exit: Press ESC key
- Command to save and exit vi
- Command: :wq
- Command to save and exit vi
- How to exit: Press ESC key
- Start up Docker Compose
- Command: sudo docker-compose up
- Copy it and paste the peppermint script into the docker-compose.yml
Note: This will startup peppermint. Here is the command to shut it down. First open up another terminal
- Command: sudo docker-compose down
Start it back up by doing this command in a terminal
- Command: sudo docker-compose up

Opening Peppermint and creating a User
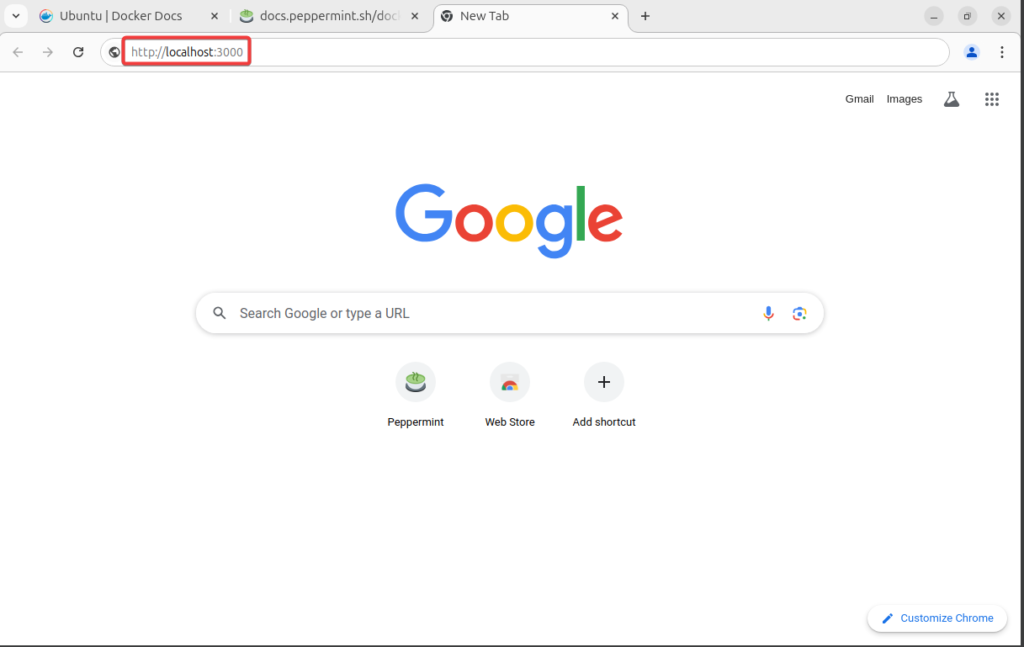
- Go to Chrome
- Use the default peppermint URL and paste into the Chrome URL
- Peppermint URL: http://localhost:3000
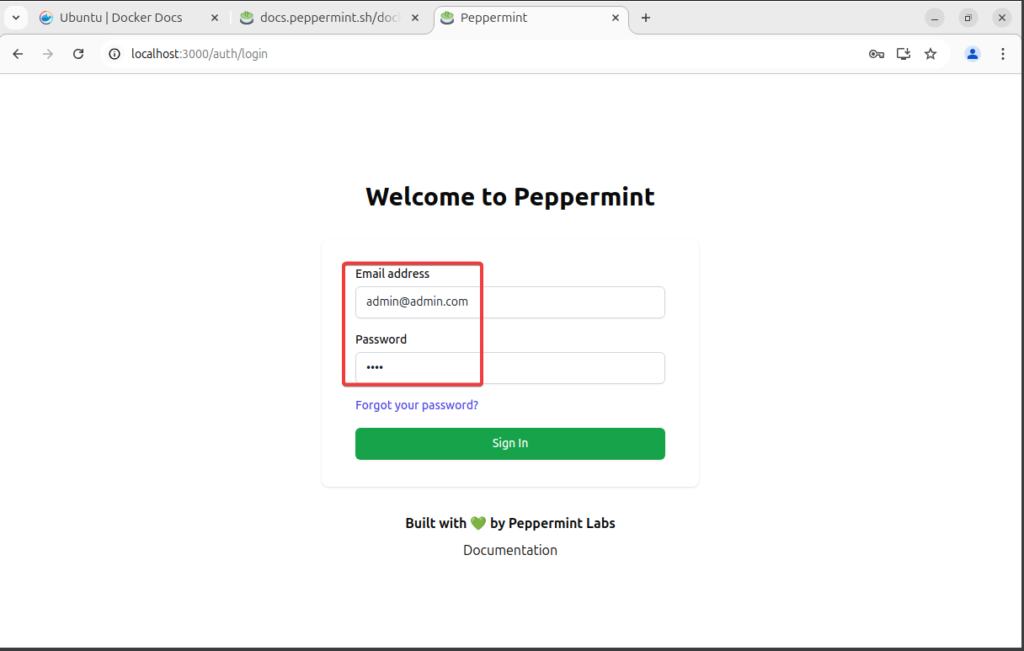
2. Login using the default credentials
- Username: [email protected]
- Password: 1234
3. Guiding you thorugh the dashboard
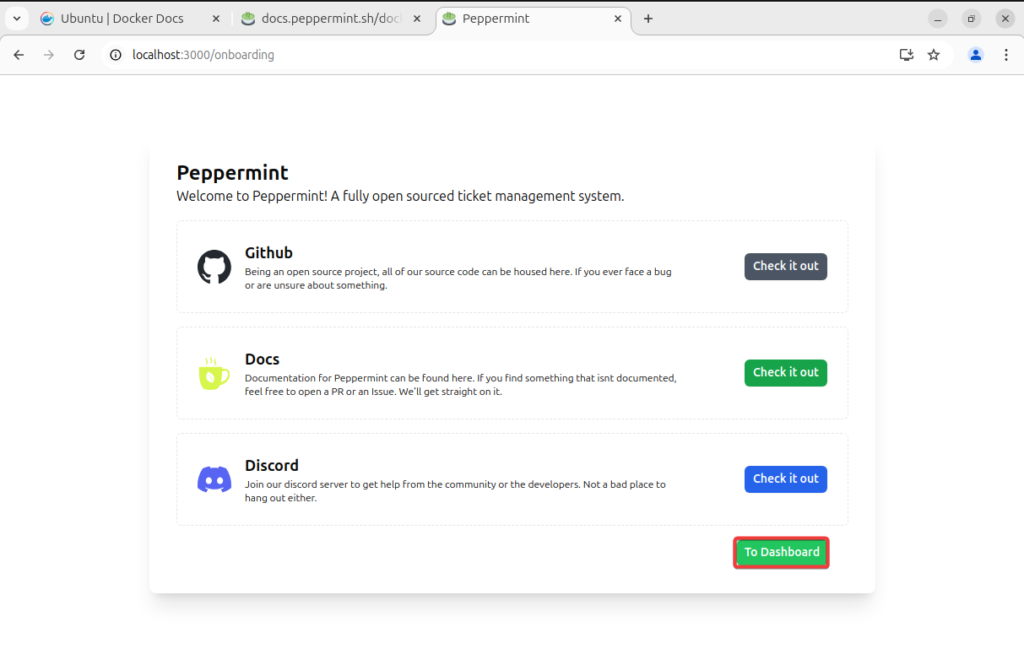
- Onboarding screen will pop up Click on Dashboard
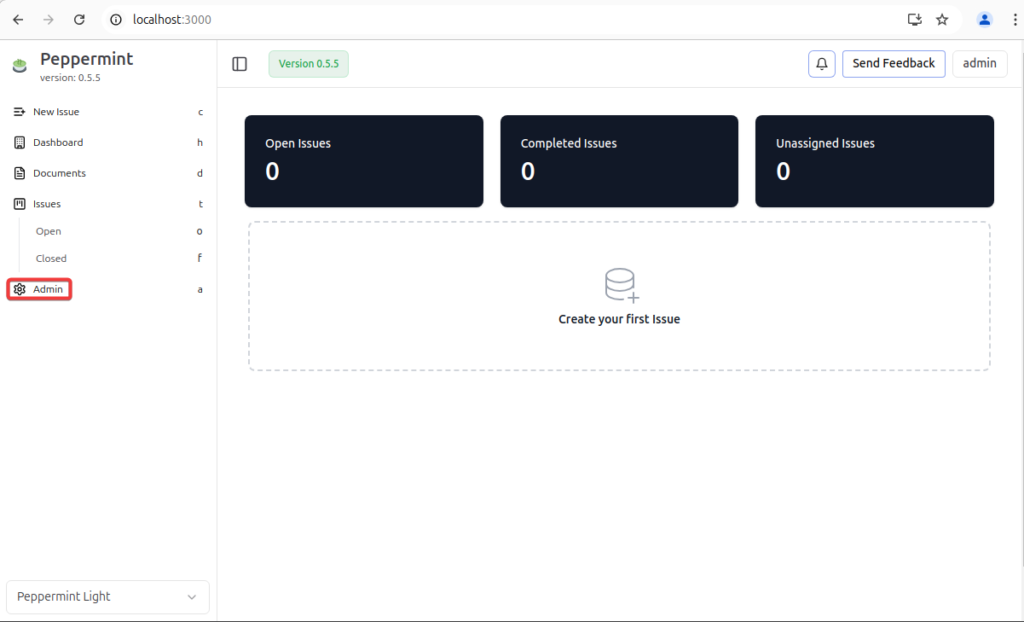
- In the dashboard Click on Admin
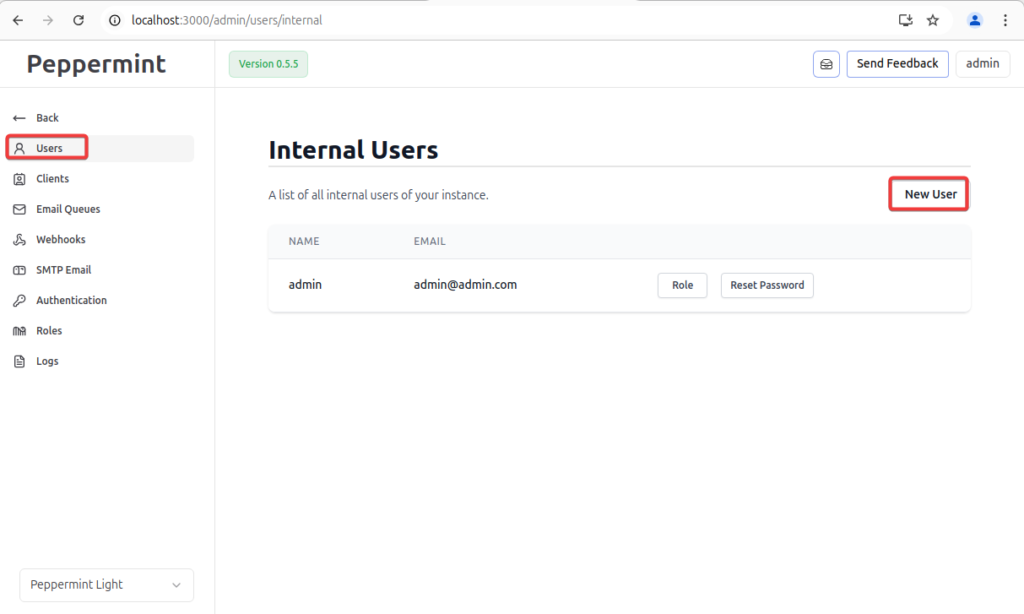
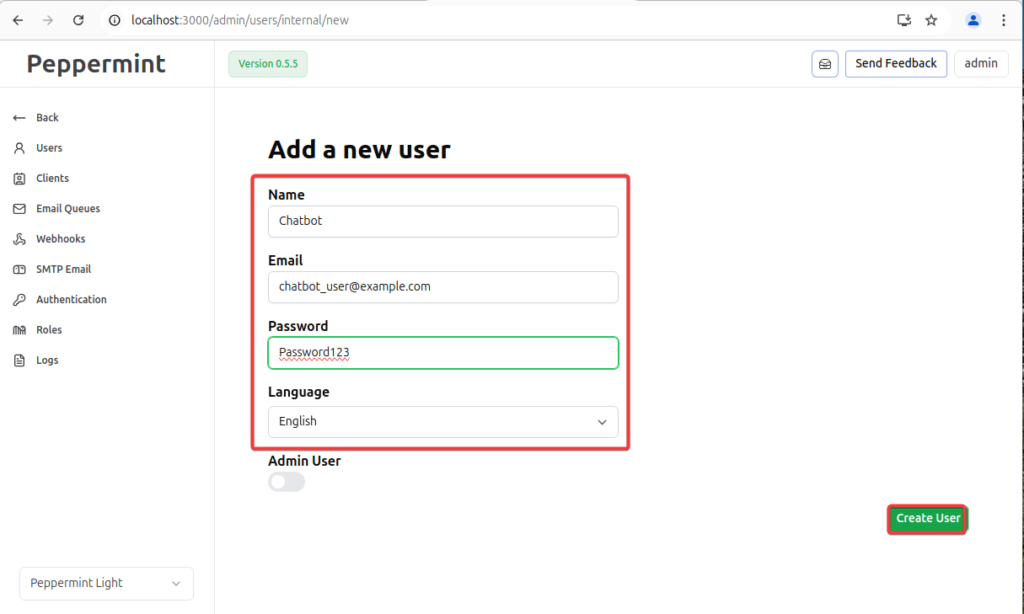
- Click on Users > New User
4. Create a user for the selenium script
- Name: Chatbot
- Email signing: [email protected]
- Password: Password123
- Create the User
5. Log into the chatbot to get rid of the sign in prompt
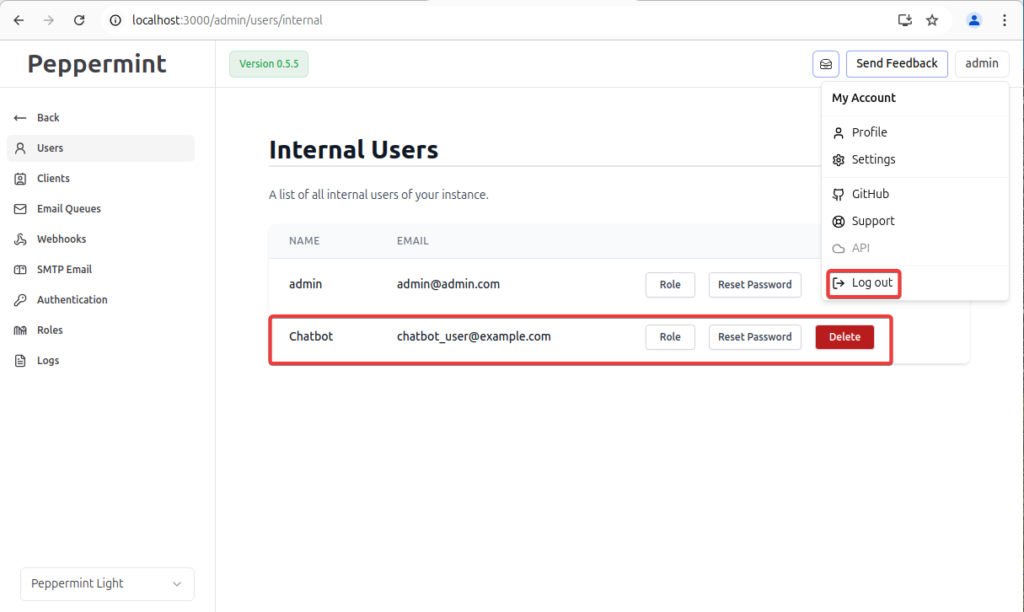
- Verify account creation
- Log out of the admin account
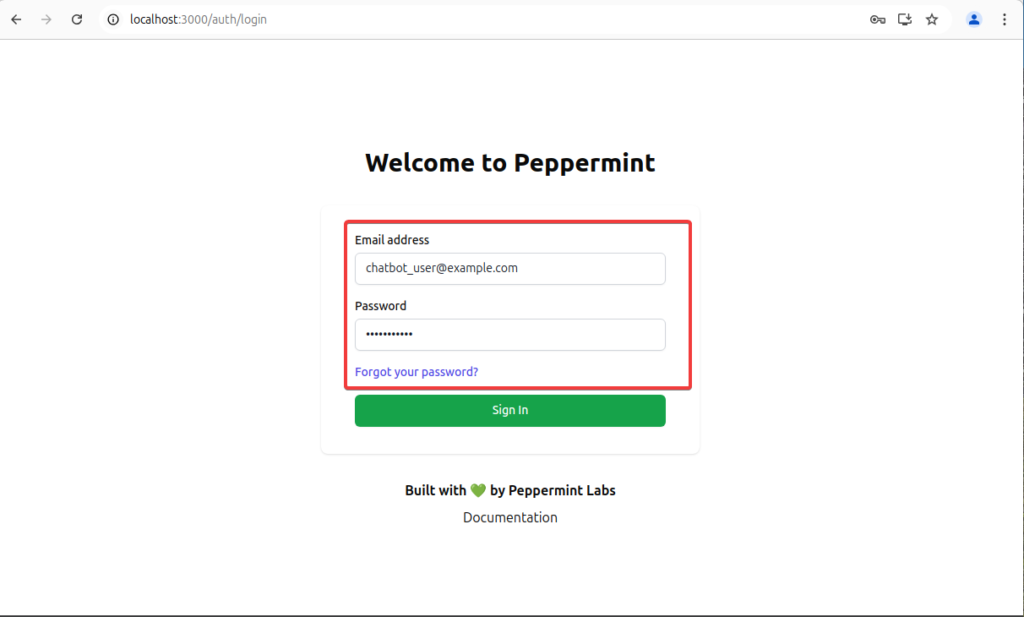
- Log in with the chatbot credentials
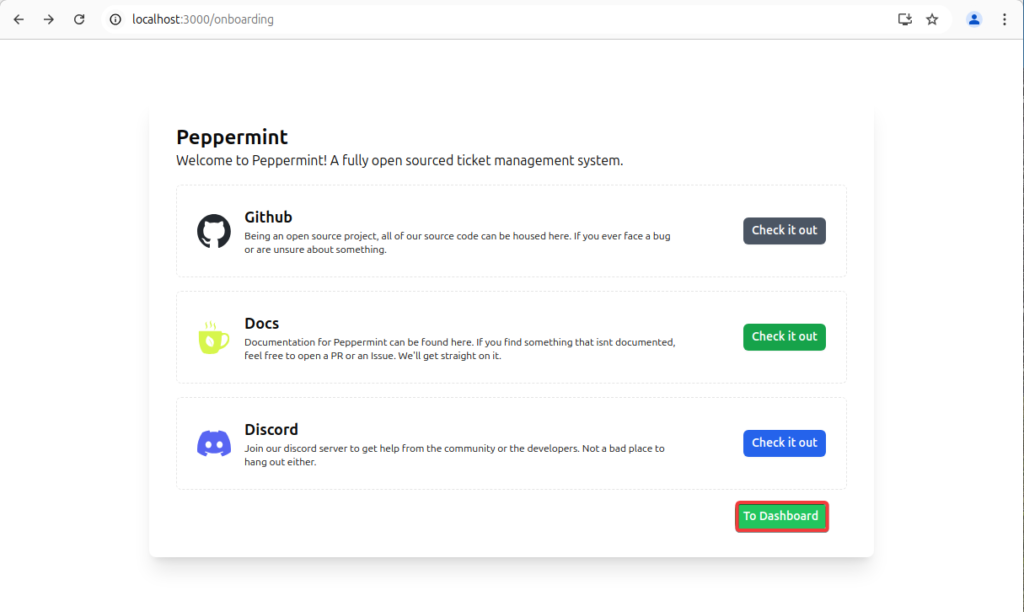
- In onboarding, Click on To Dashboard (We need this prompt not to be there so the script runs well)
- Log out of the chatbot account
Downloading the google chrome driver
- Finding the google chrome version
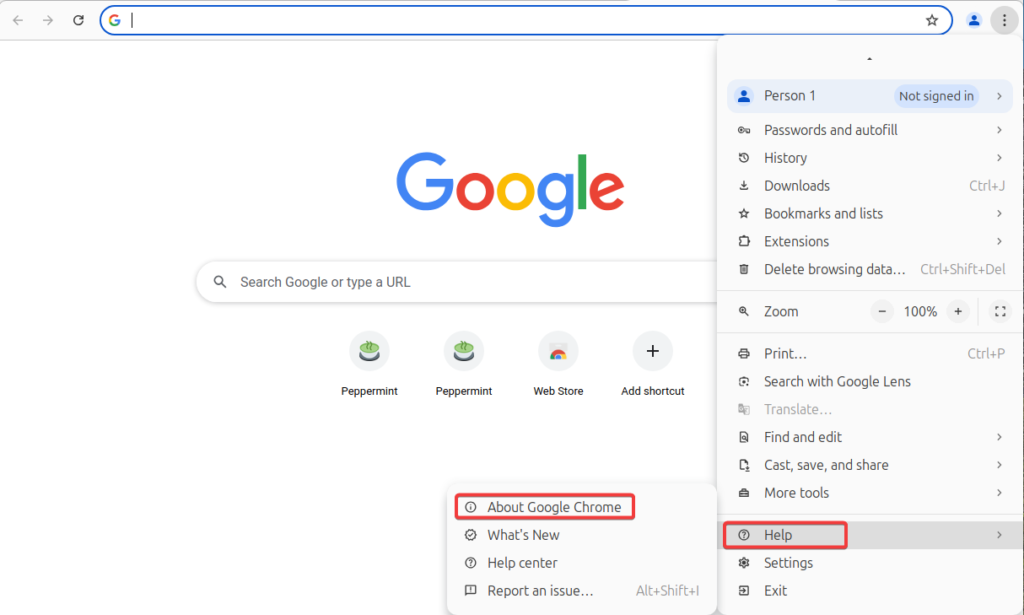
- Open Google Chrome
- Click the three-dot menu in the top right corner
- Navigate to Help > About Google Chrome
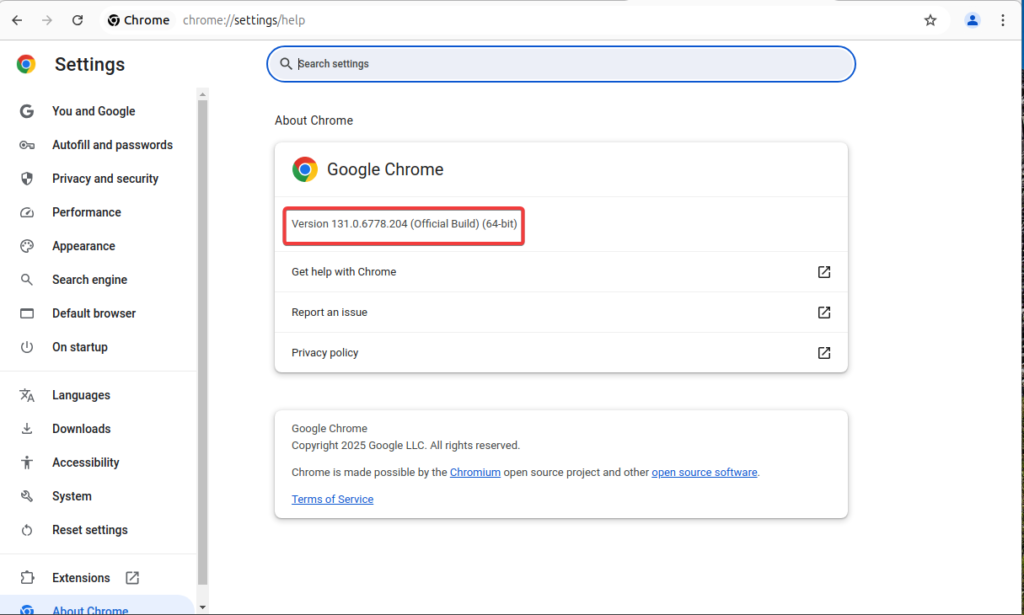
- Note the version number displayed (mine was 131.0.6678.204)
2. Downloading Google Chrome Driver
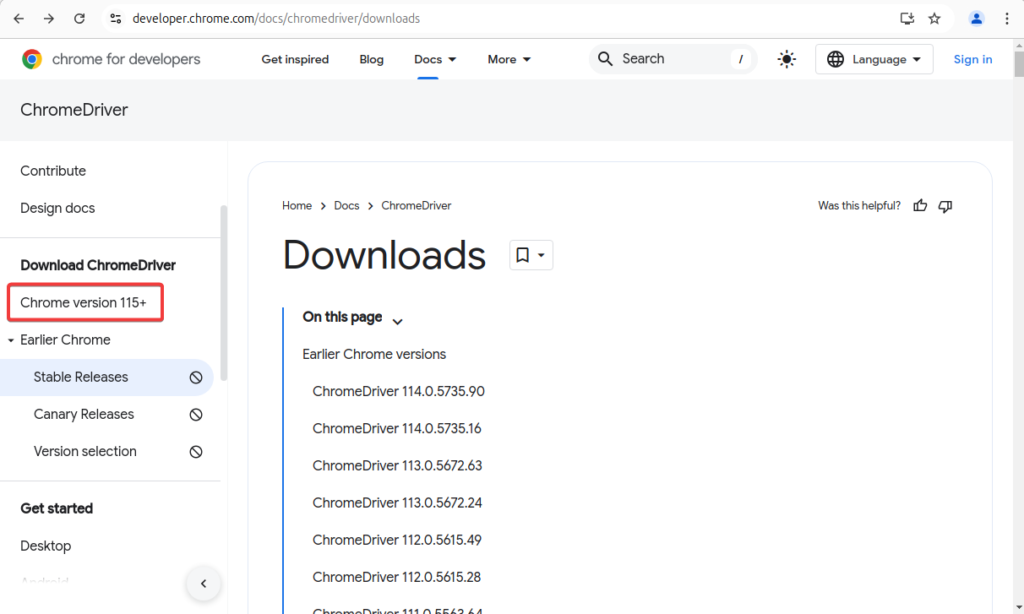
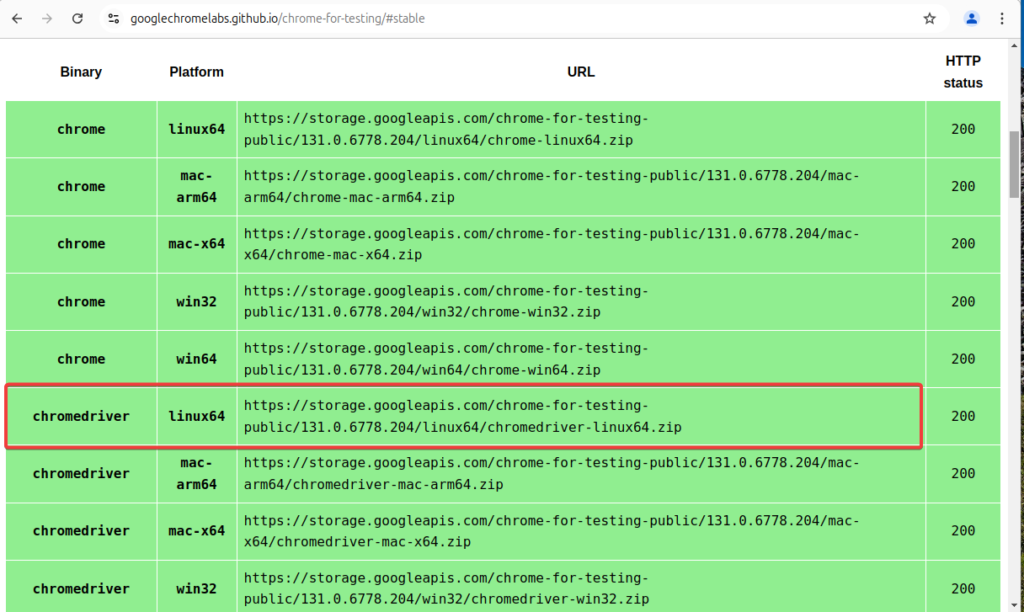
- Link for the chrome drivers: https://developer.chrome.com/docs/chromedriver/downloads
- Select your version (the newest will be the 115+ Beta)
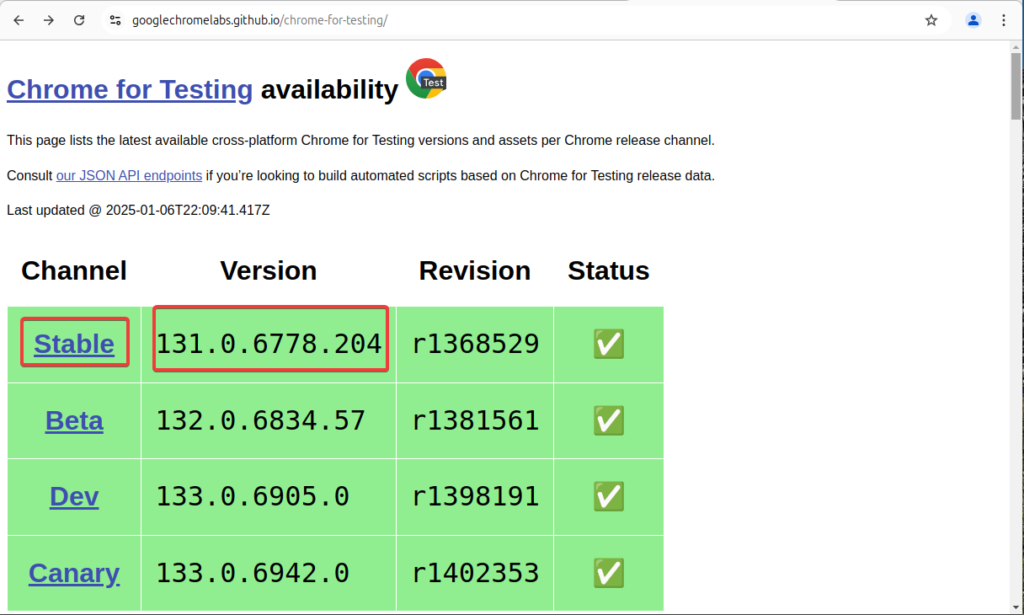
- Select the channel (mine is stable)
- Select a Binary (chrome driver)
- Make sure to check that it is linux
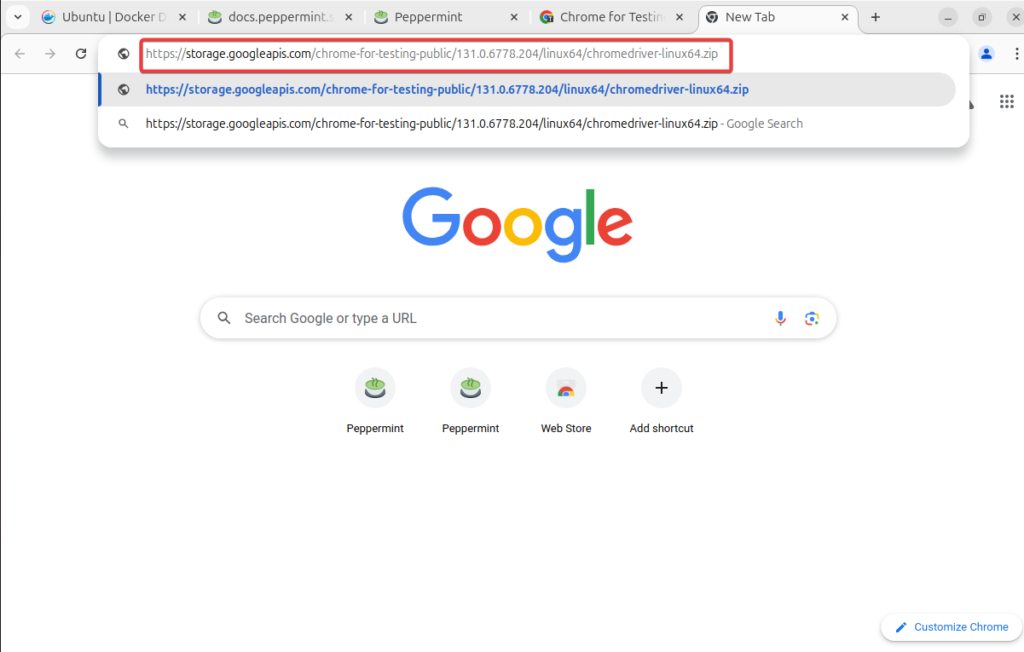
- Copy the URL and open another tab and paste it (it should automatically download)
Extracting the chrome driver and installing it
Make sure to open another terminal.
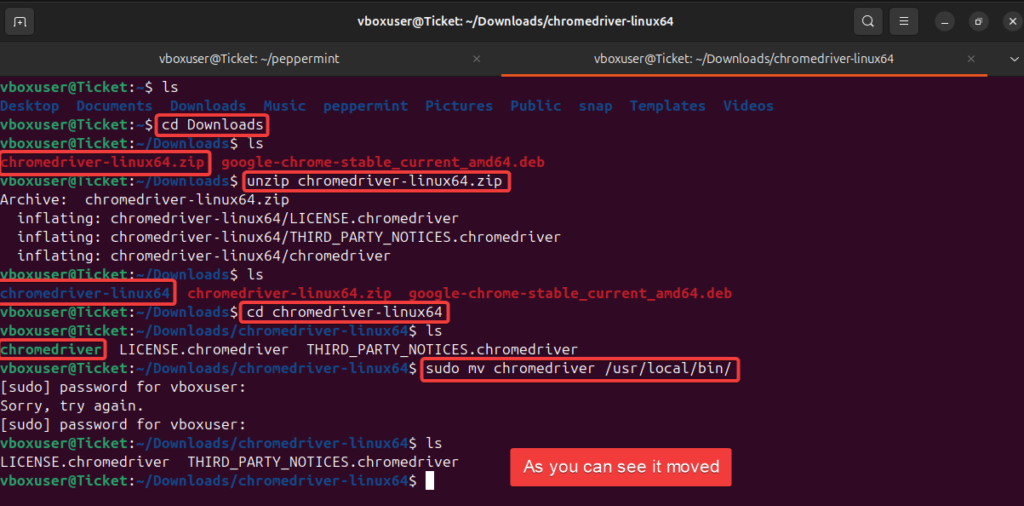
- Go to the Downloads Directory
- Be in the home directory
- This command will then take you to the Downloads.
- Command: cd Downloads
- This command will then take you to the Downloads.
- Unzip the chromedriver-linux64.zip file
- Command: unzip chromedriver-linux64.zip
2. Move the file to /usr/local/bin/
- Go into the newly made chrome driver directory
- Command: cd chromedriver-linux64
- Move the chromedriver to the /usr/local/bin/ directory
- Command: sudo mv chromedriver /usr/local/bin/
- Verify the installation
- Command: chromedriver –version
- You should see the version displayed
- Command: chromedriver –version

Install Python and Selenium
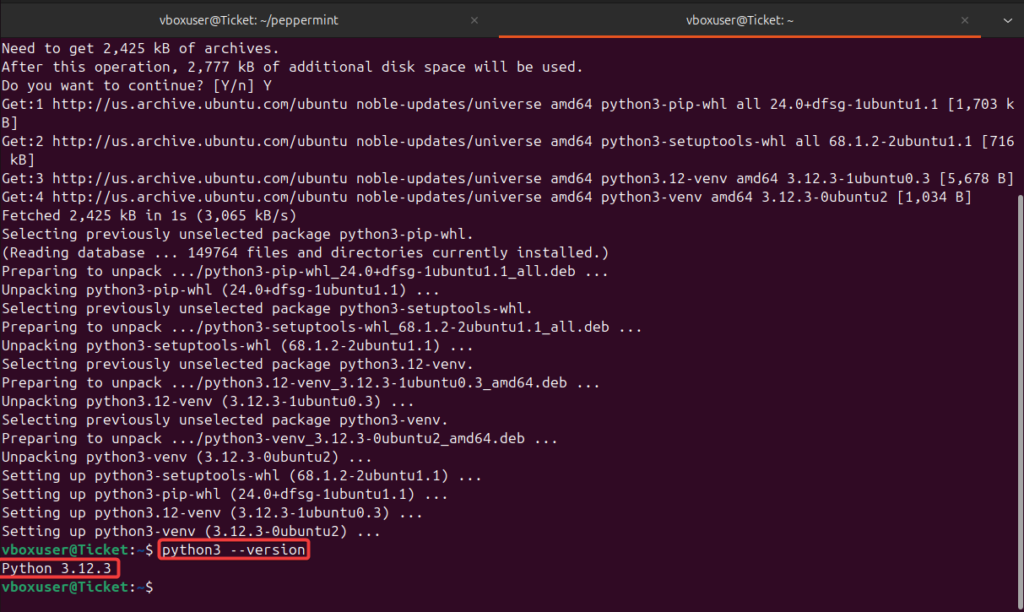
- Installing Python
- We will be running selenium in a virtual python environment
- Command: sudo apt install python3 python3-venv
- Verify the Python installation
- Command: python3 –version
2. Setup the Virtual Environment
- Go to the peppermint directory (Be in the home directory first)
- Command: cd peppermint
- Create and activate the virtual environment
- Command: python3 -m venv venv
- Now let’s activate it
- Command: source venv/bin/activate
- You’ll know you are in because it will show `venv` on the left
- Command: source venv/bin/activate
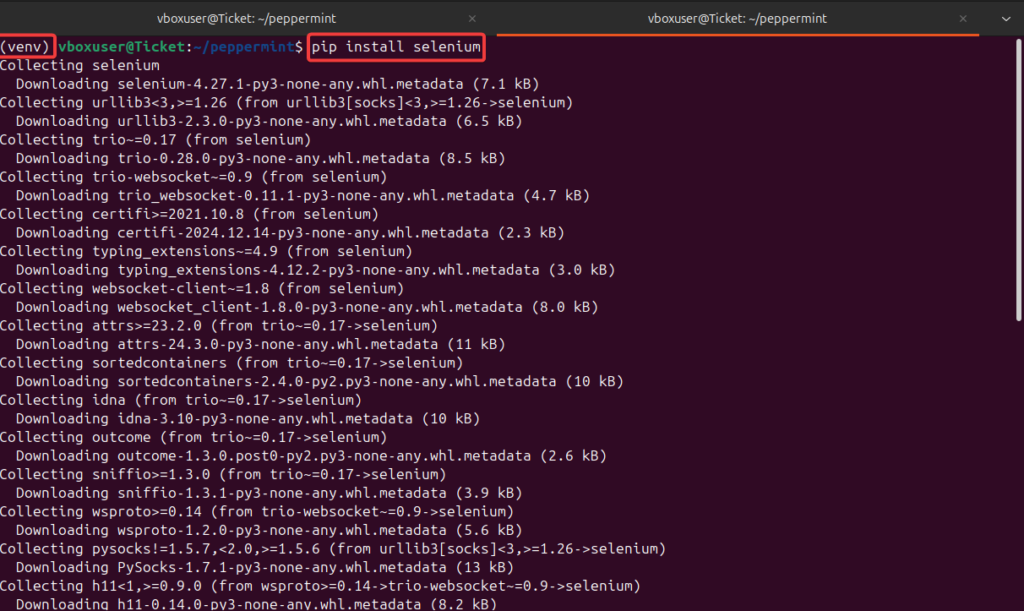
3. Install Selenium
- Install the Selenium library inside the virtual environment
- Command: pip install selenium
Note: This is how you get out and deactivate the virtual environment in the terminal (BUT DON’T DO IT YET)
- Command: deactivate
- Command: source venv/bin/activate


Creating the Python Script
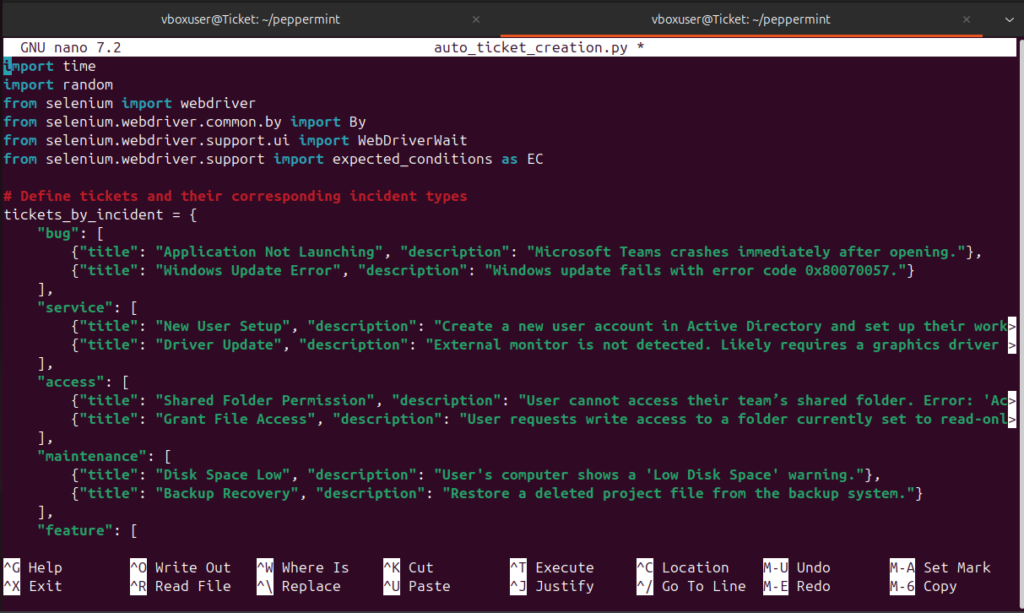
- Create the Python Script (Be in venv) in the peppermint directory
- Using nano to create it
- Command: nano auto_ticket_creation.py
This is the script: Google Drive link
- How to get out of nano
- Press the keys to Save: CTRL + O
- Press the keys to leave the insert: ENTER
- Press the keys to exit: CTRL + X
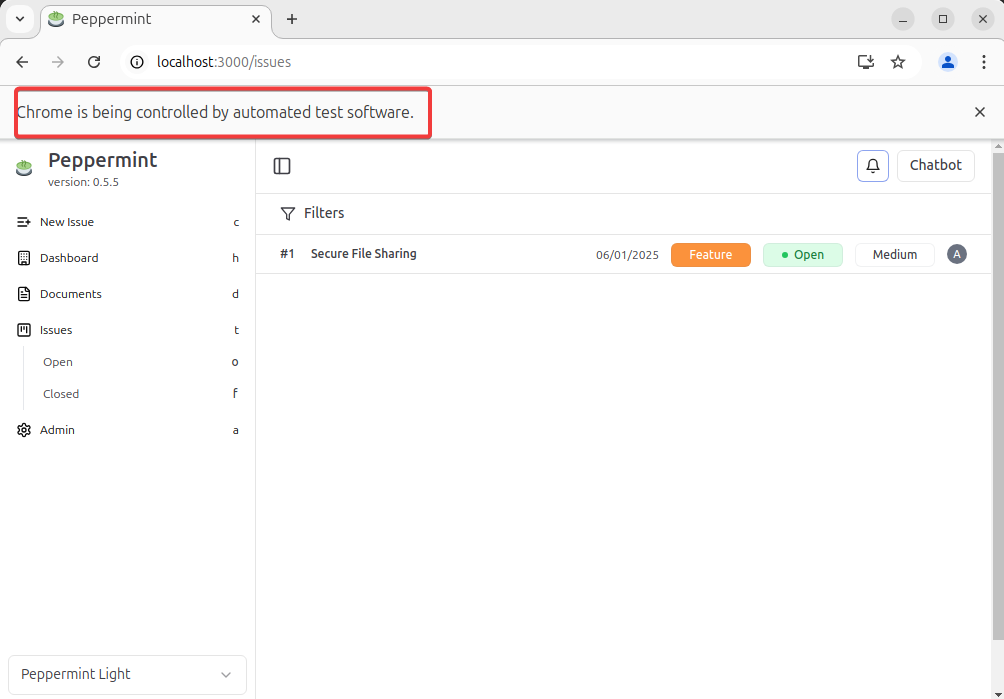
2. Start the script while Peppermint is running and in venv
- Command: python3 auto_ticket_creation.py
Note to stop the terminal running the script this is the command.
- Command: CTRL + C



HOw to start it all up from the start
- Be in the peppermint directory
2. Run this command to start up the peppermint docker
- Command: docker-compose up
3. Open a new terminal and start up the python virtual environment in the peppermint directory
- Command: source venv/bin/activate
4. Start up Selenium in venv mode
- Command: python3 auto_ticket_creation.py
Final Thoughts
If you have any questions, leave them down below, and I will respond. I hope you all liked this lab and enjoyed it!
