The purpose of this lab is for creating an environment to analyze malware in a controlled and safe environment.
What is Malware Analysis?
The process of determining the origin, potential impact, and functionality of a malware sample.
There’s two ways to analyze malware:
Static – Studying the behavior of malware without executing it.
Dynamic – Studying the behavior of malware while it’s executed.
things You'll Need
- Virtual Box
- Windows 10 ISO
- Flare-VM (Will be downloaded in the VM)
- Remnux
- INetSim (Will be configured/downloaded in Remnux)
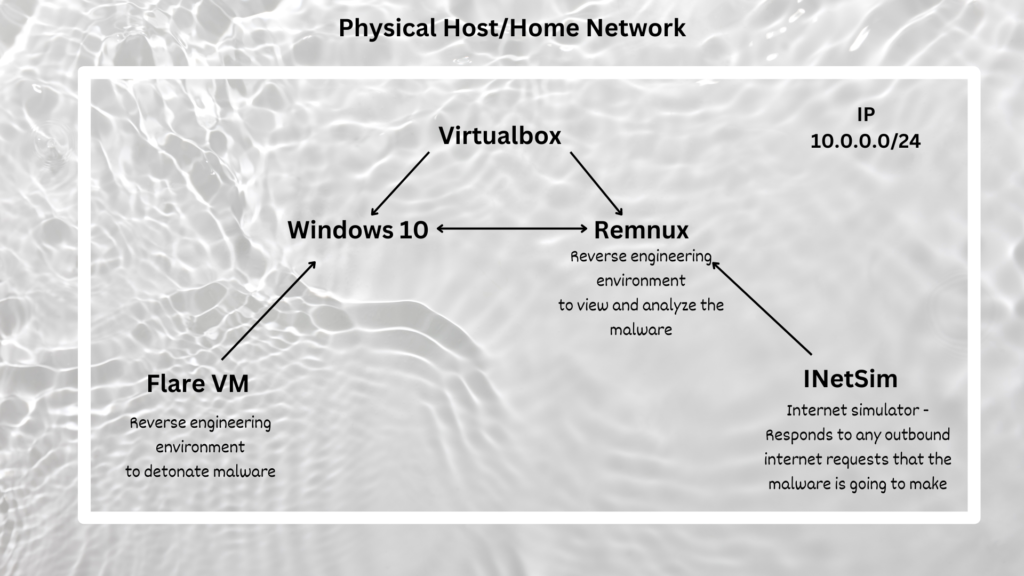
Topology
Setting up Virtual Box & Windows 10
Have Virtual Box & Windows 10 ISO downloaded >> Create a folder named “Virtual Box ISO” >> In that folder have a Windows 10 ISO & create a folder called Windows 10 Storage
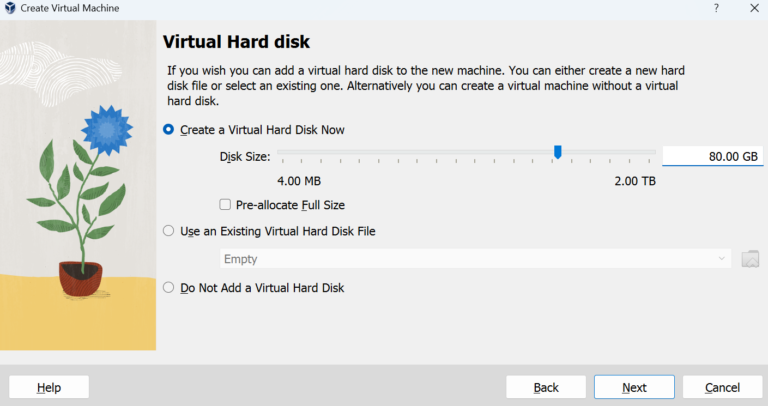
Start up Virtual Box >> New >> Rename (Windows 10 Malware Analysis) >> Folder (Windows 10 Storage) >> ISO (Windows 10) >> Skip unattended installation >> Min 4GB-8GB Max Memory >> 2 CPU Processors >> 80 GB of virtual hard disk space >> Finish

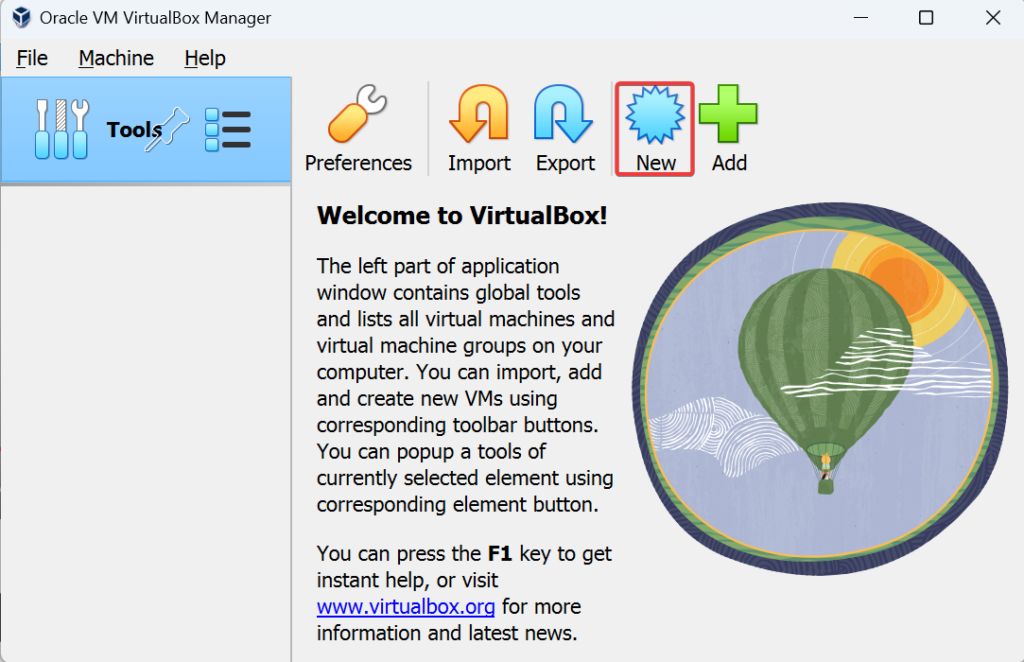
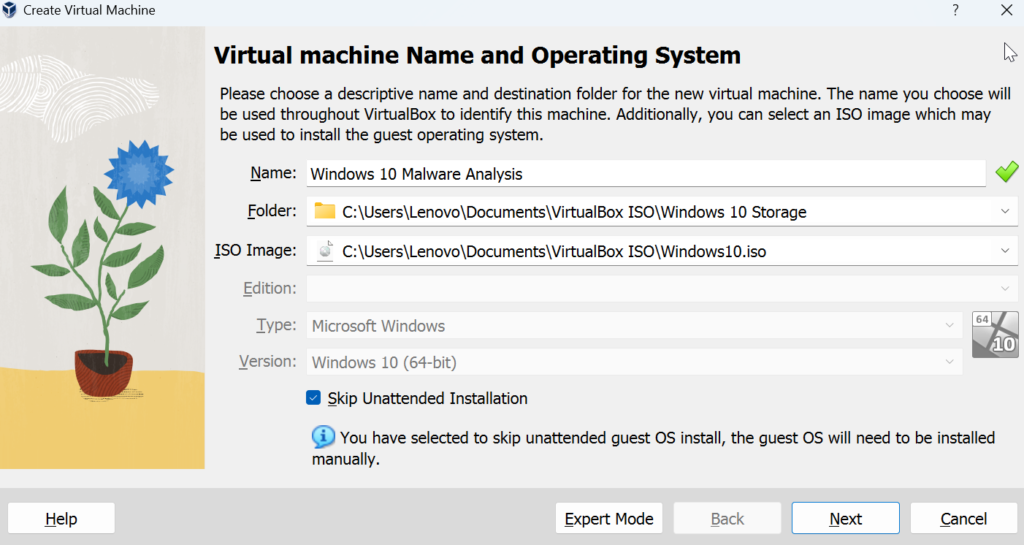
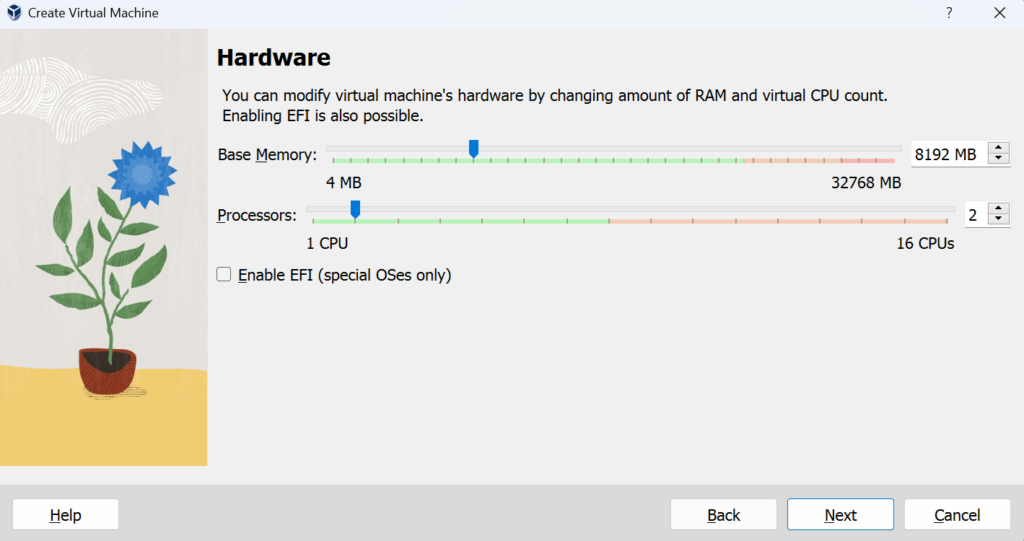
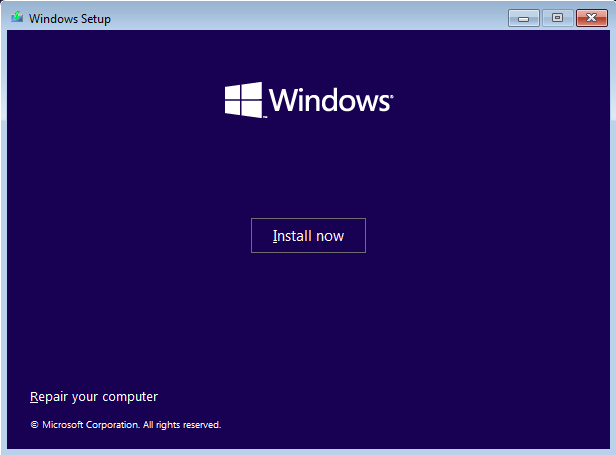
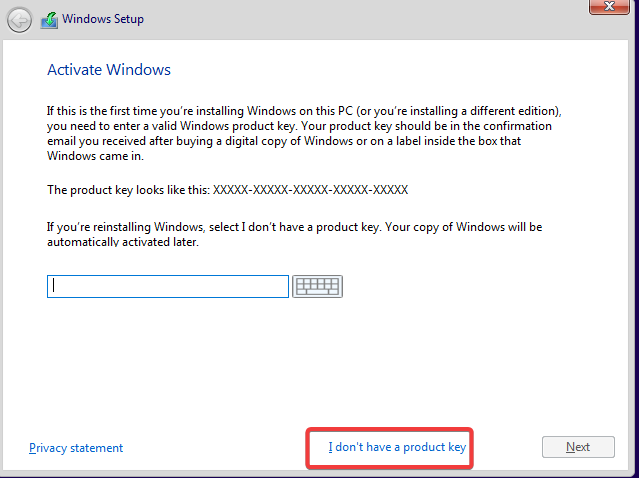
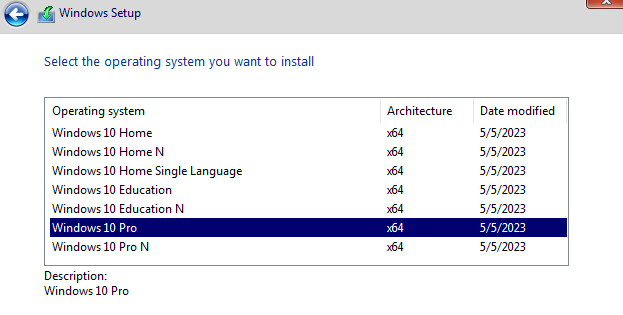
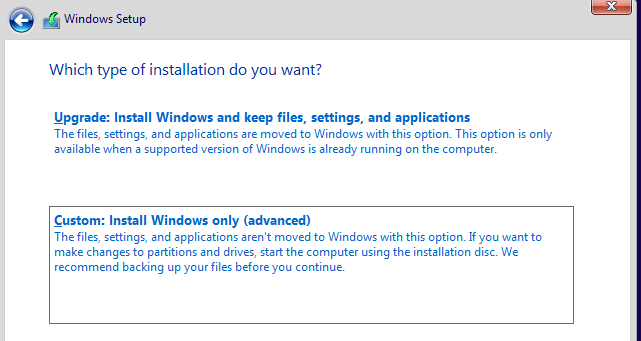
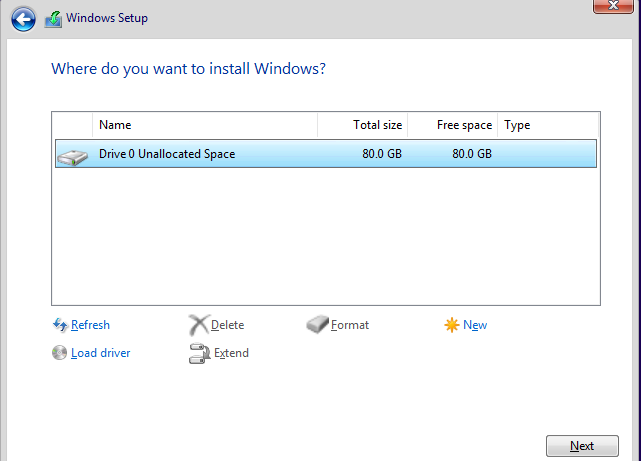
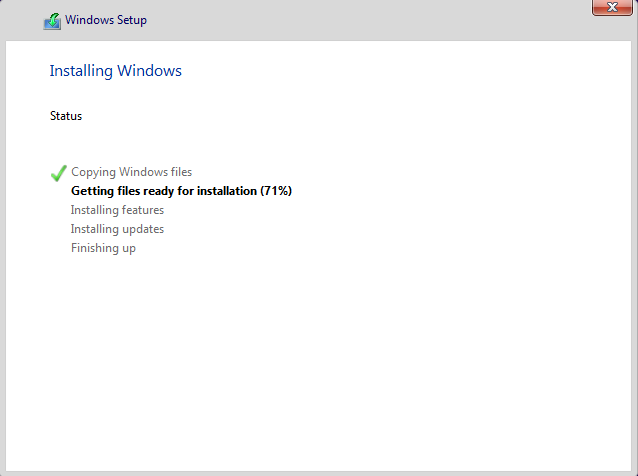
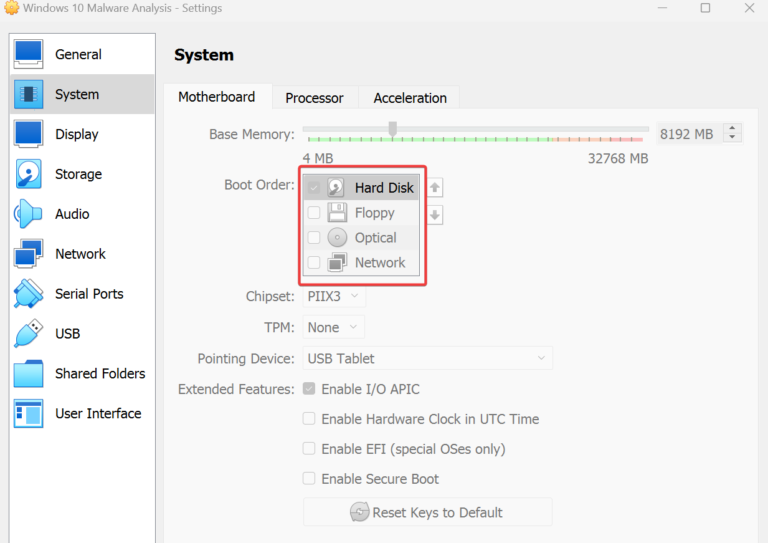
Start up the Windows 10 VM >> Install Now >> Select “I don’t have a product key” >> Select Windows 10 Pro OS >> Accept license terms >> Custom Install Windows >> Default Drive >> Install >> After it’s done installing it will reboot and take you back into the Installation process just save and power it off >> Go to settings >> System >> Motherboard >> Uncheck Floppy & CD >> Start the VM back up
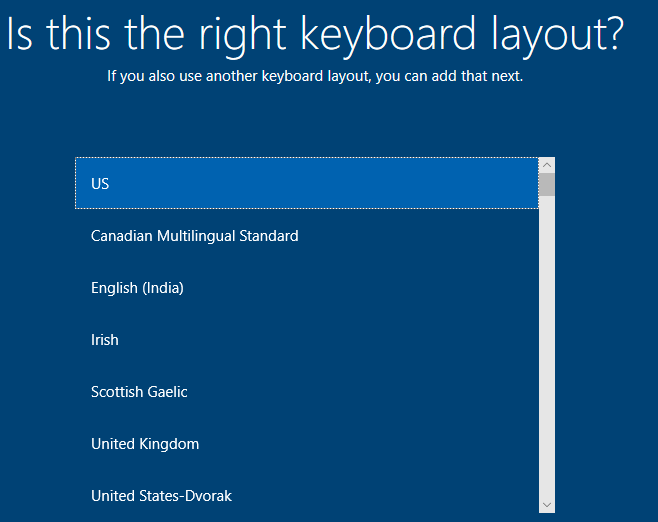
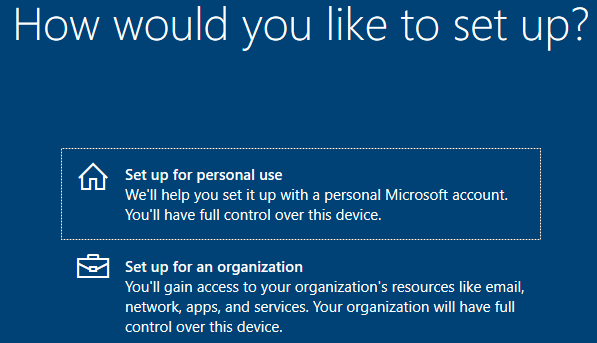
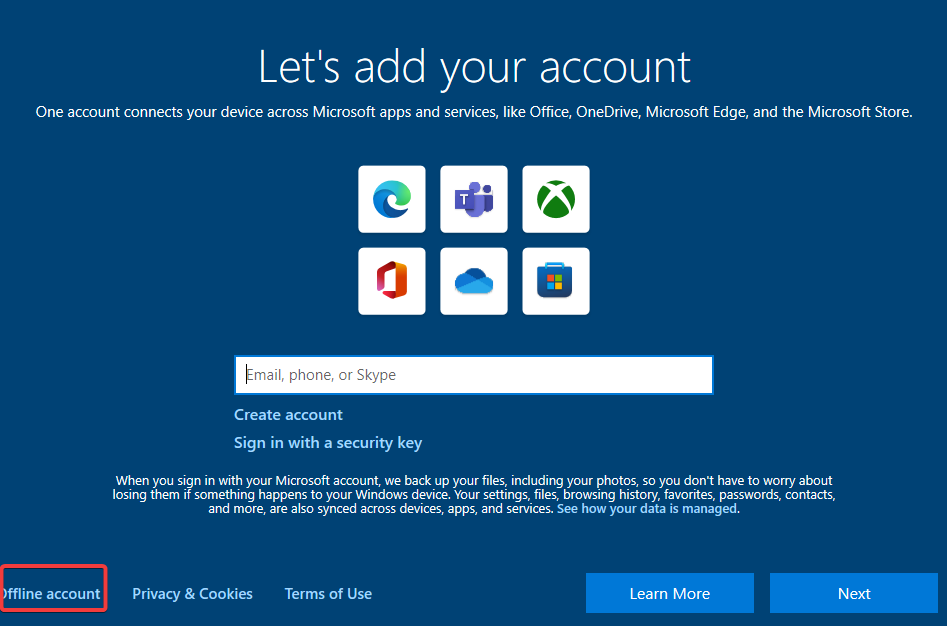
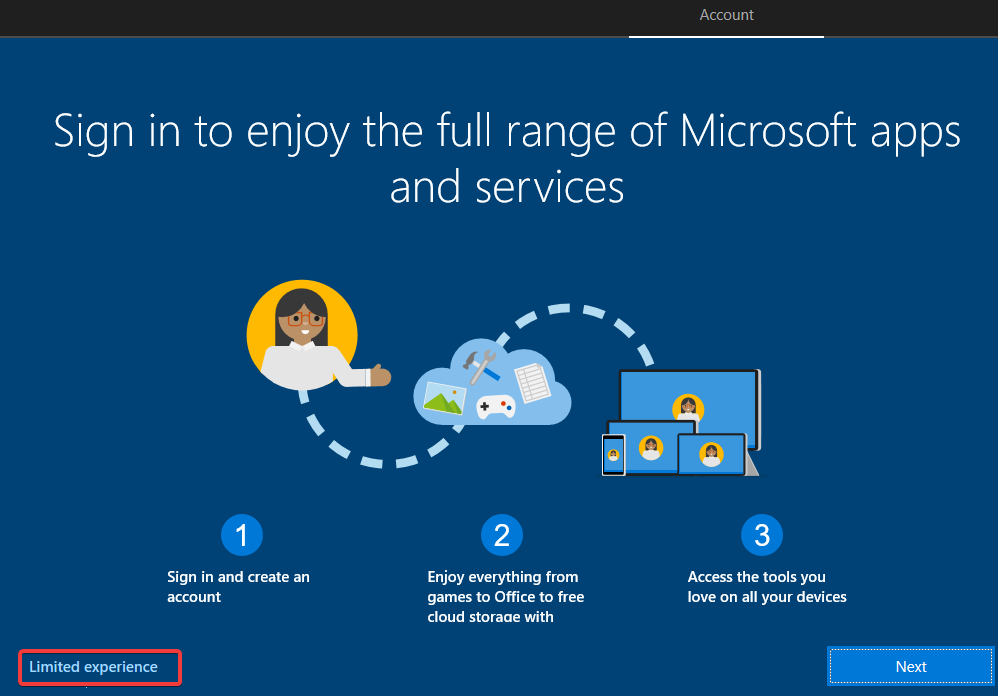
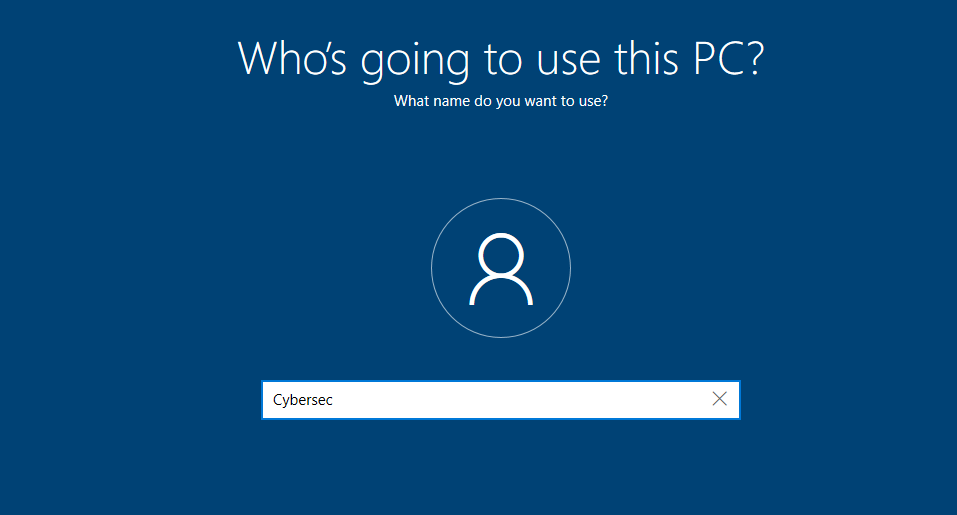
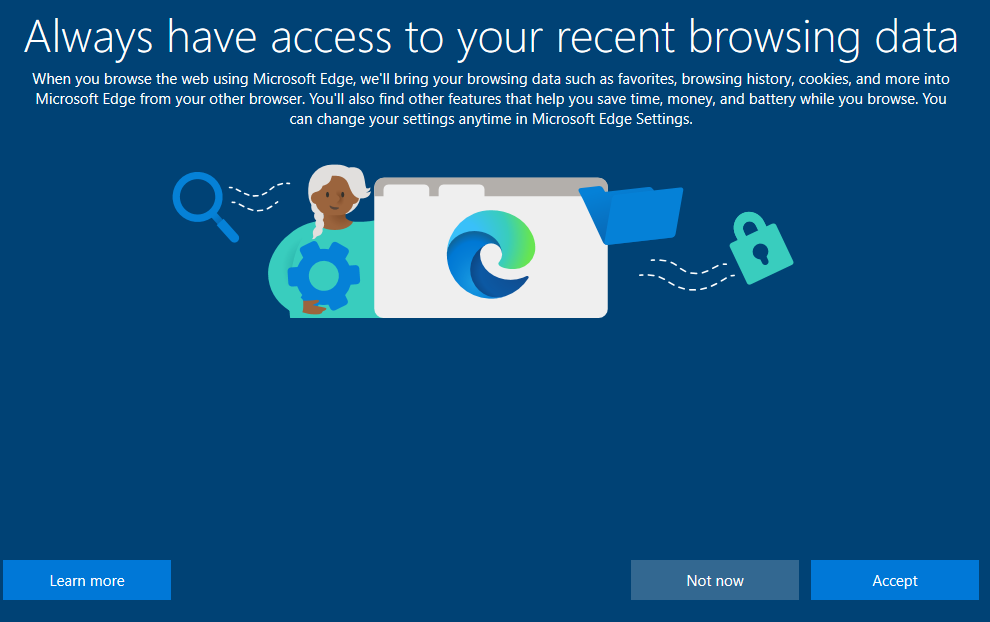
Once it’s back up select region >> Select Keyboard layout & skip second keyboard >> Setup for personal use >> Offline account >> Limited experience >> Create Username & Password >> Select “not now” for browsing history and everything else it gives you after that just select “not now/skip” >> Let it reboot

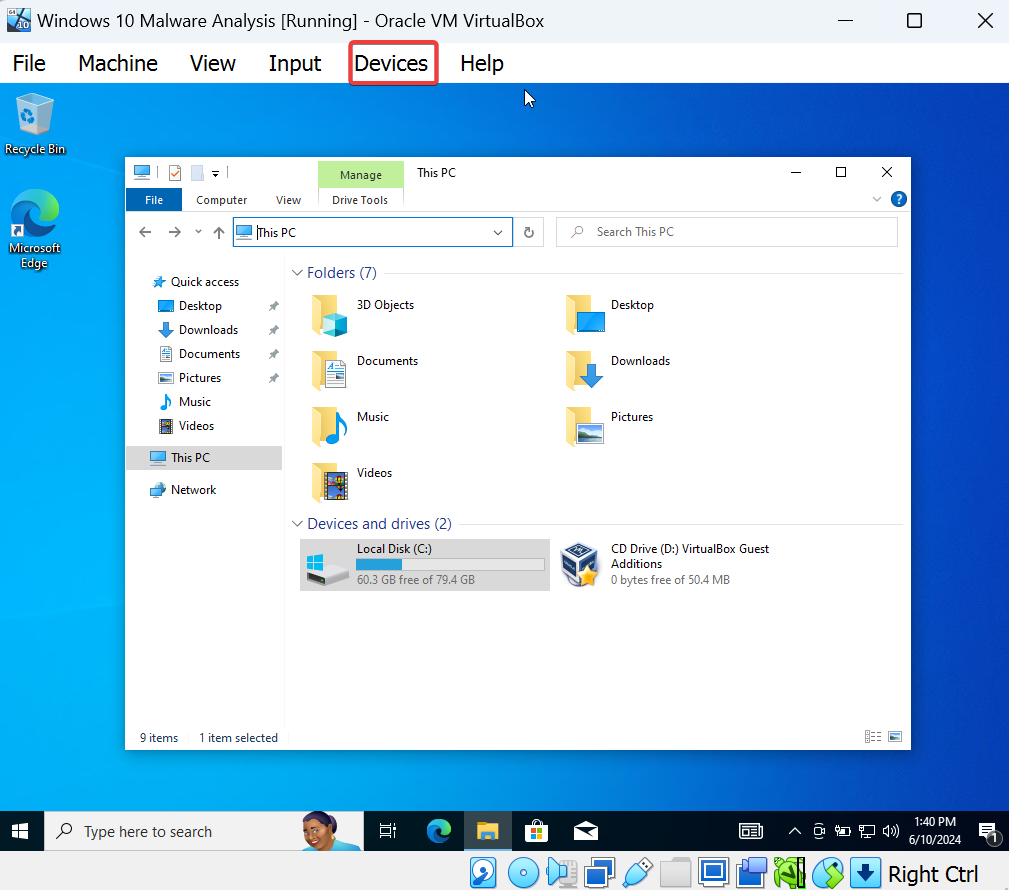
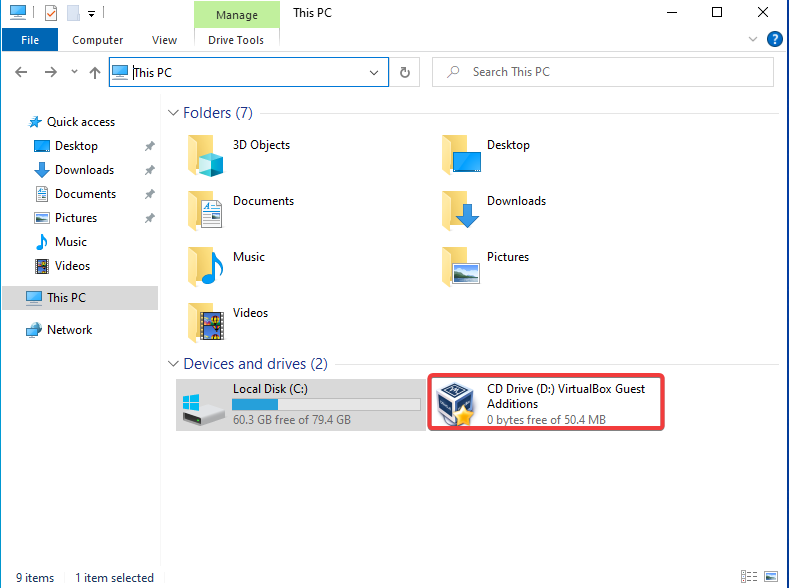
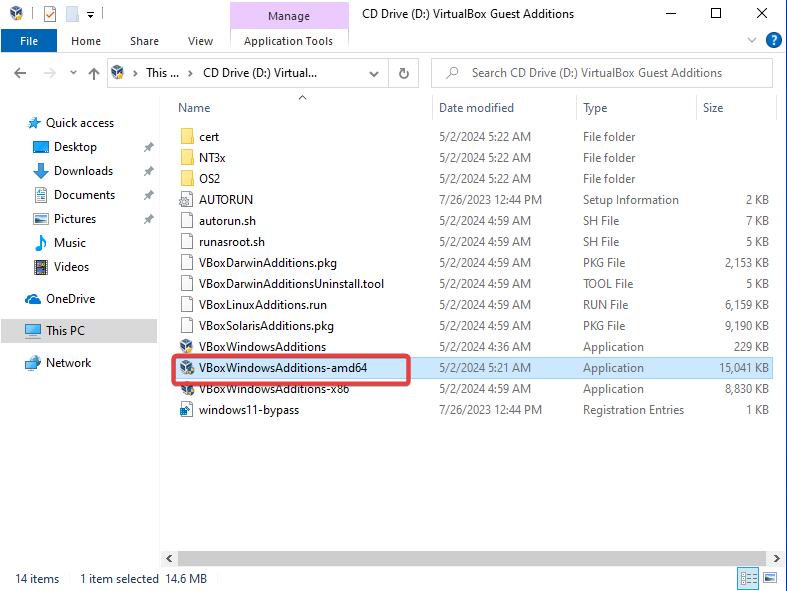
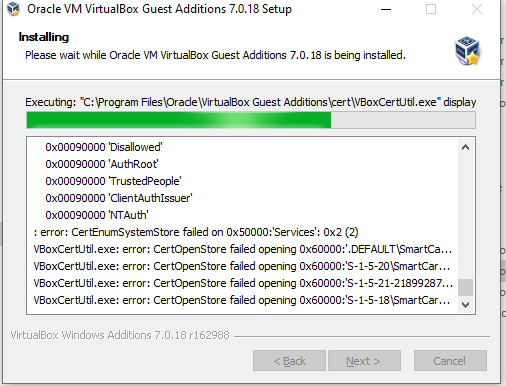
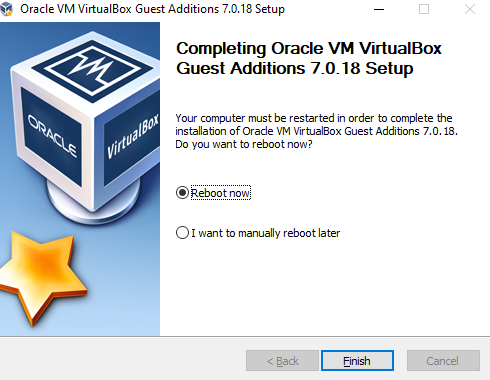
In virtual box select “Devices” >> Select “Insert Guest Addition CD Image” >> Once completed in Windows 10 VM go to file explorer >> Select MY PC >> Select virtual box guest additions >> Double click and install “VBoxWindowsAdditions-Amd64 >> Everything default in the installation process >> Reboot
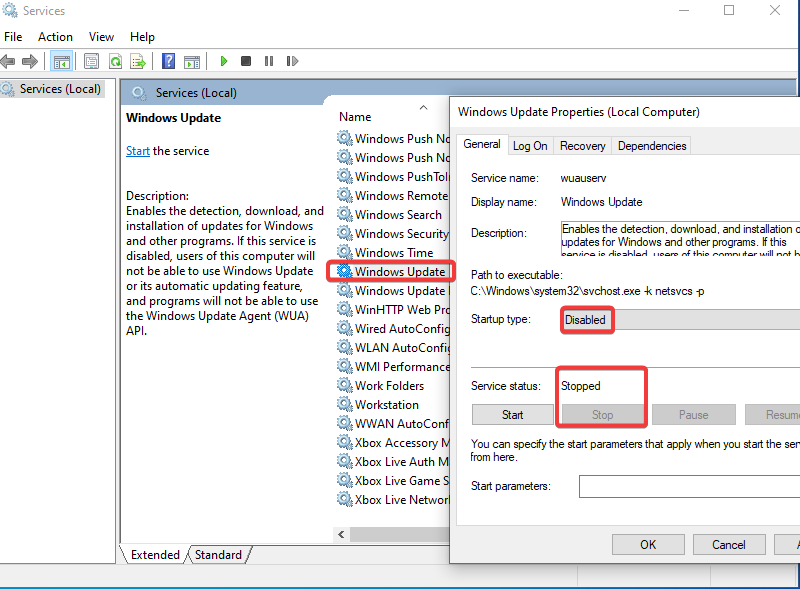
Disabling Windows Update
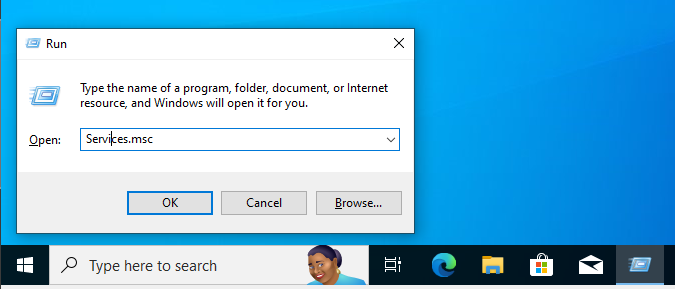
In the VM do Windows button + R to bring up Run command window >> Type in services.msc >> Scroll all the way down until you see windows update & stop it >> Startup type (disable) >> Apply >> Ok
Disabling Windows Defender
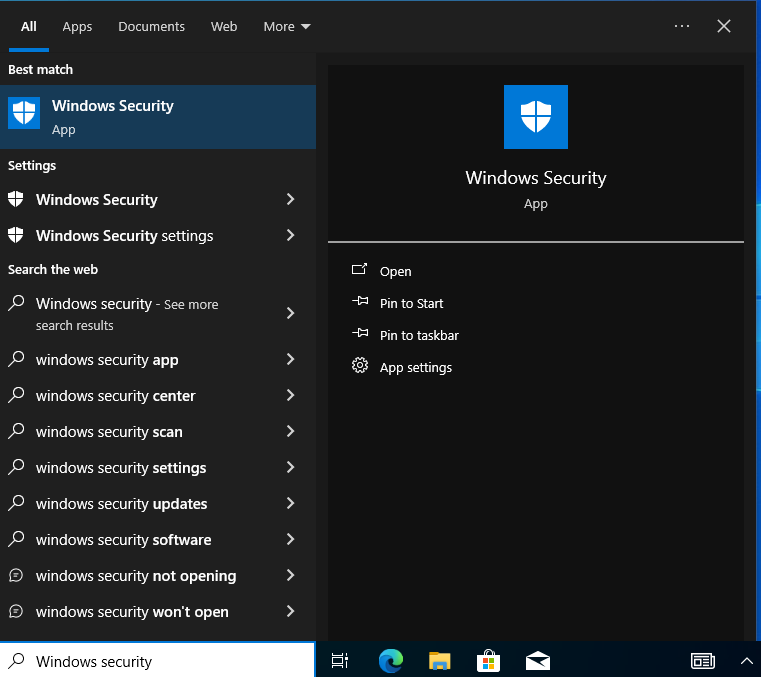
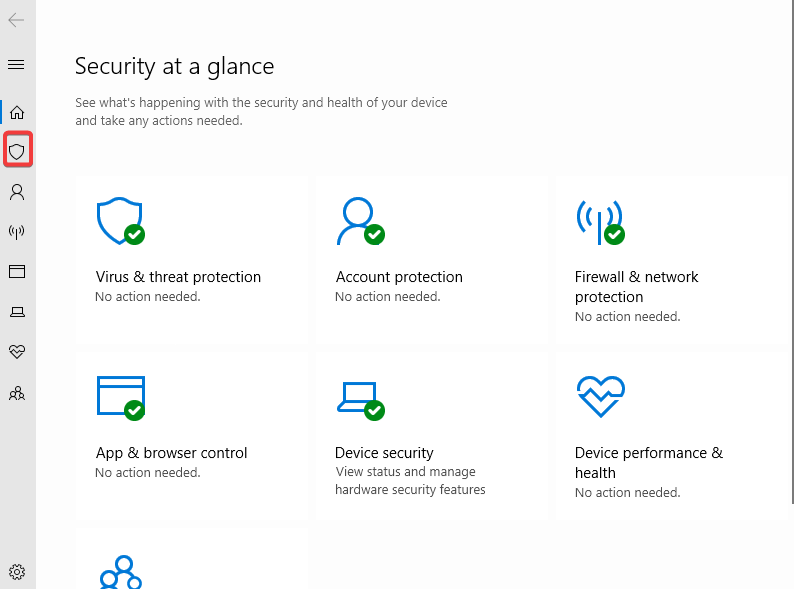
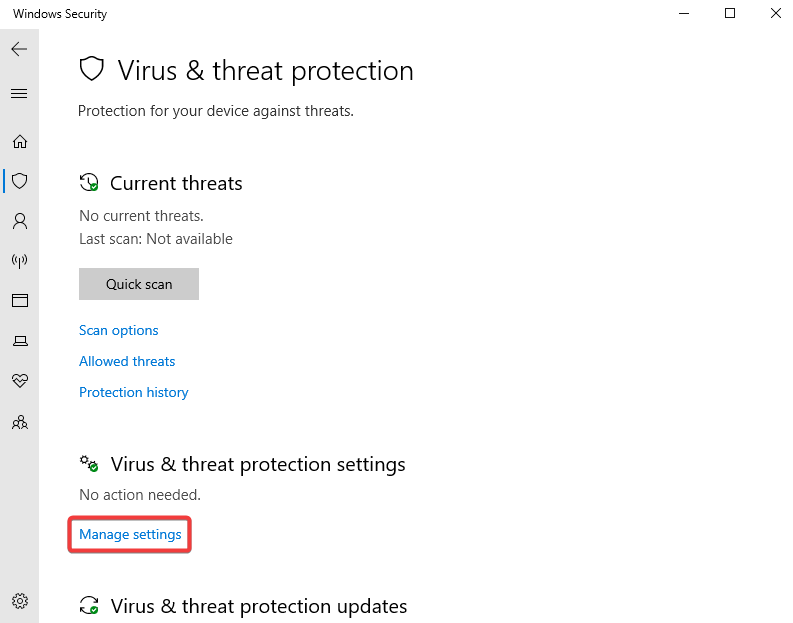
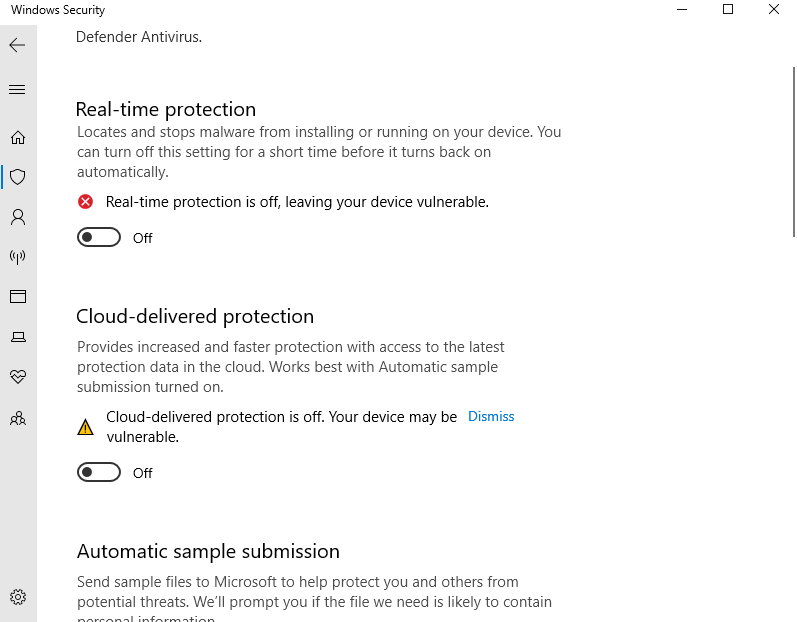
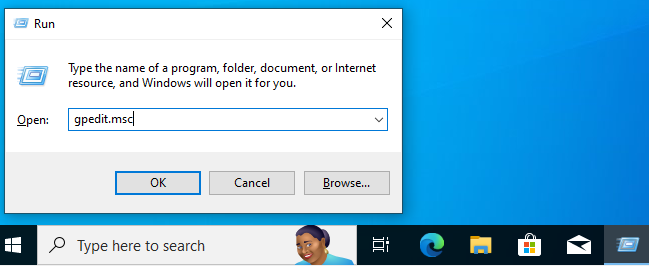
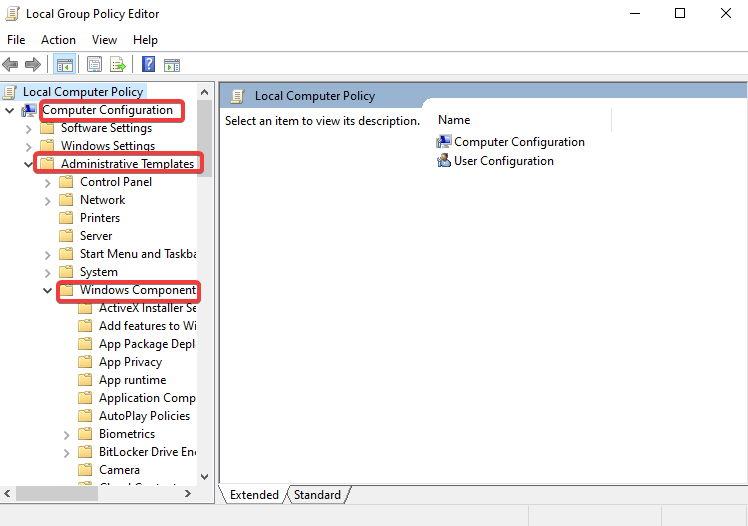
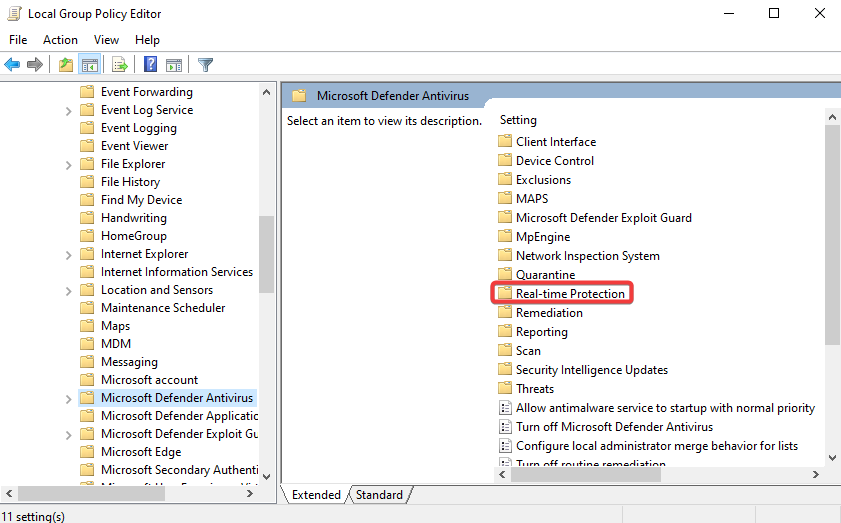
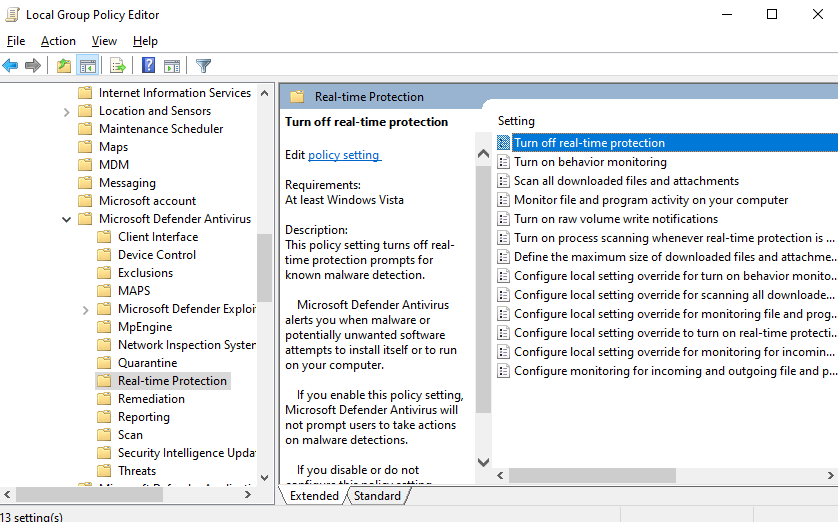
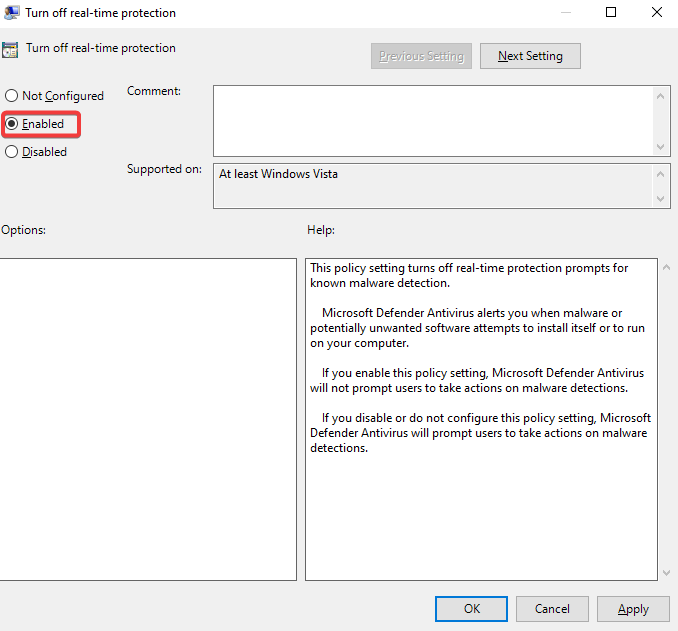
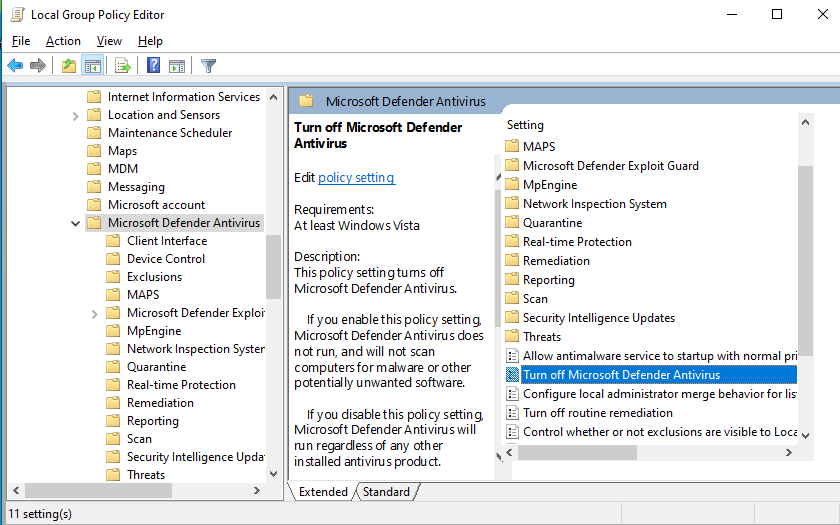
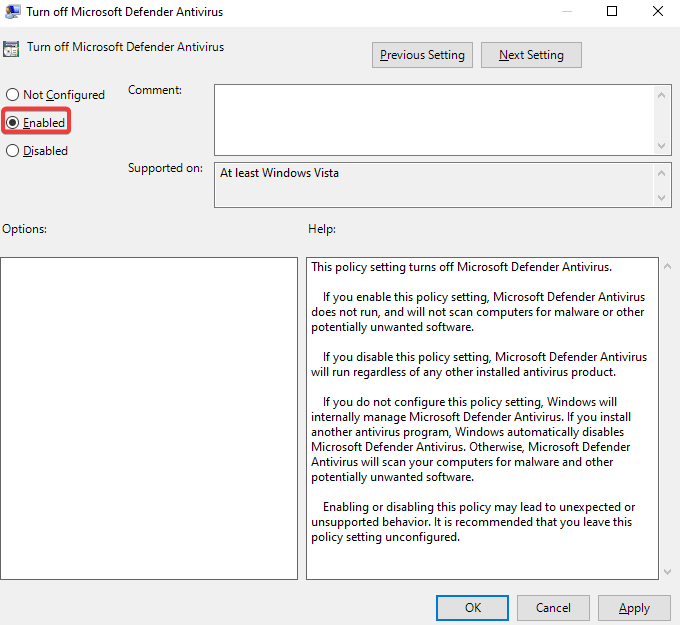
In the search bar type in “Windows Security” & open it up >> Click the shield button >> Manage settings >> Turn off everything in there >> close it all once done >> Do Windows button + R >> gpedit.msc >> Computer configurations & expand administrative templates >> Expand Windows components >> Scroll down to Microsoft Defender Antivirus & click it >> Click on real-time protection >> Double click turn off real-time protection >> Enable >> Apply >> Ok >> Now Click Windows Defender Antivirus >> Double click Turn off windows defender antivirus >> Enable >> Apply >> Ok >> Restart the PC VM
Disable Hide Extensions & Show Hidden Files & Folders
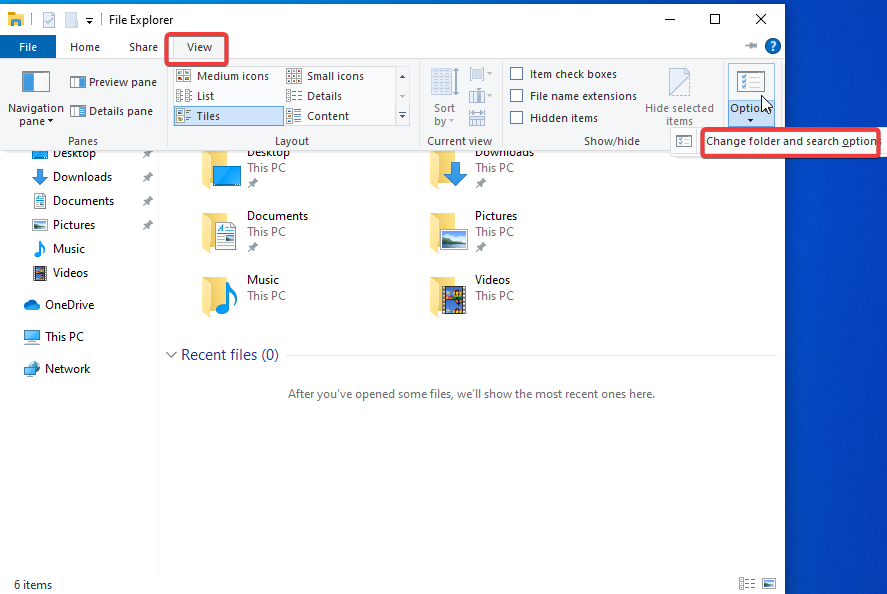
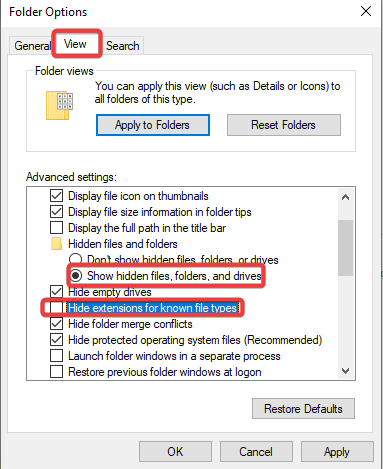
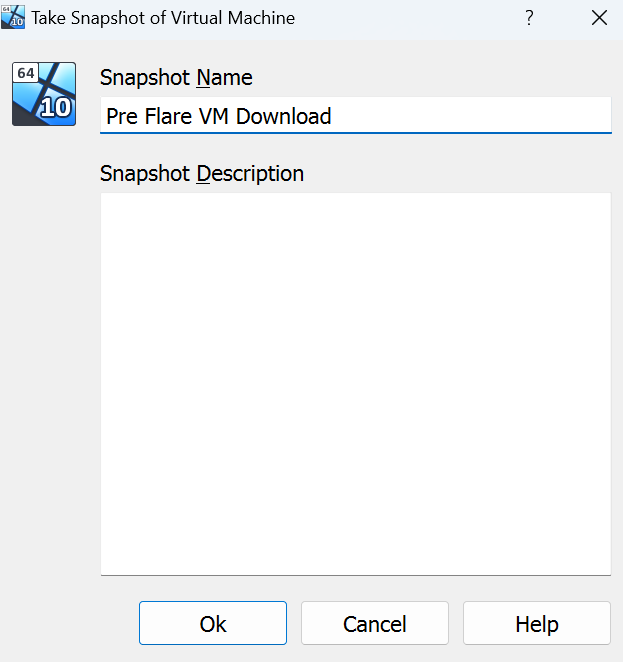
Head to File Explorer >> Click View >> Options >> Change folder and search options >> View >> Scroll down and mark “Show hidden folders, files, and drives” >> Right under that uncheck hide extensions for known folder types >> Apply >> Ok >> Create a Screenshot
Setting up Flare-VM
Note: I changed cpu cores to 3 & memoy to 12GB because it wouldn’t download
Also note that it took me three times for the install to succeed which is normal for what i’ve seen online
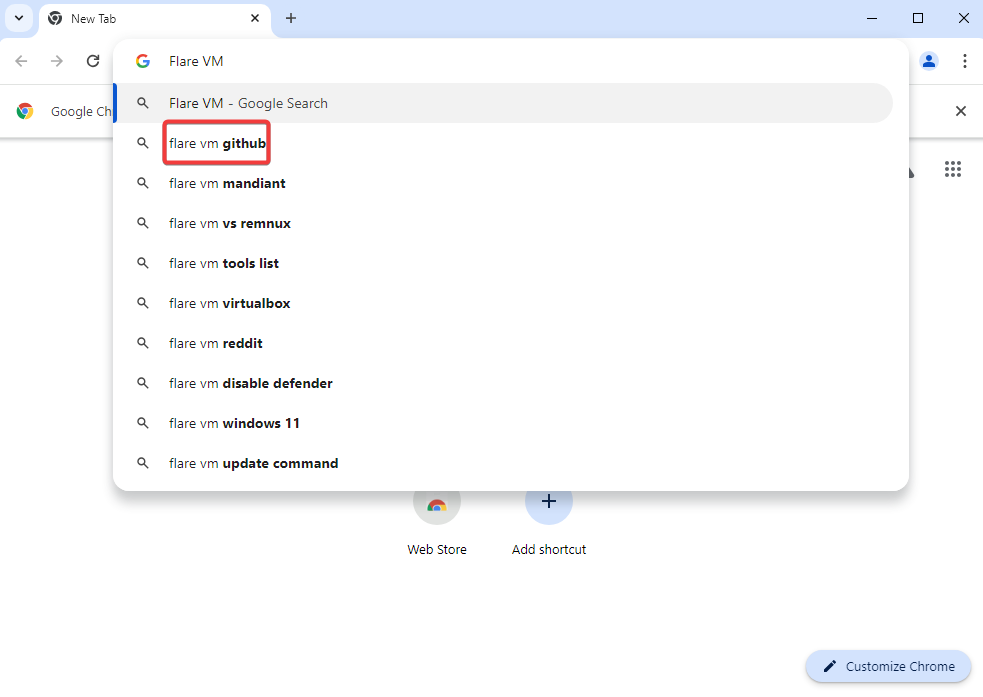
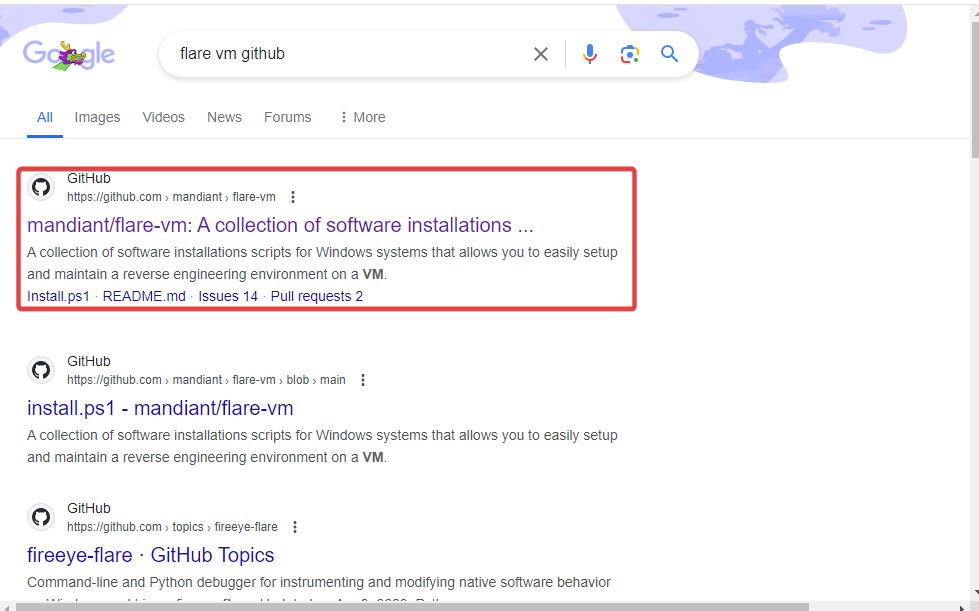
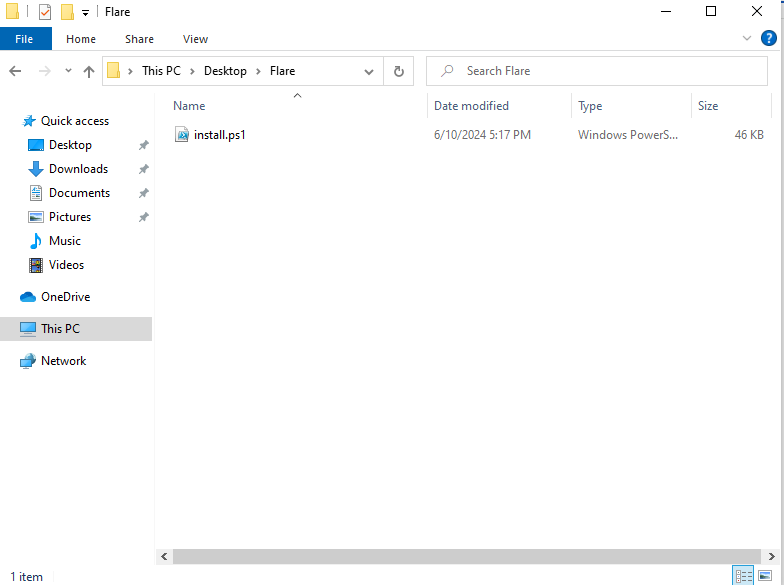
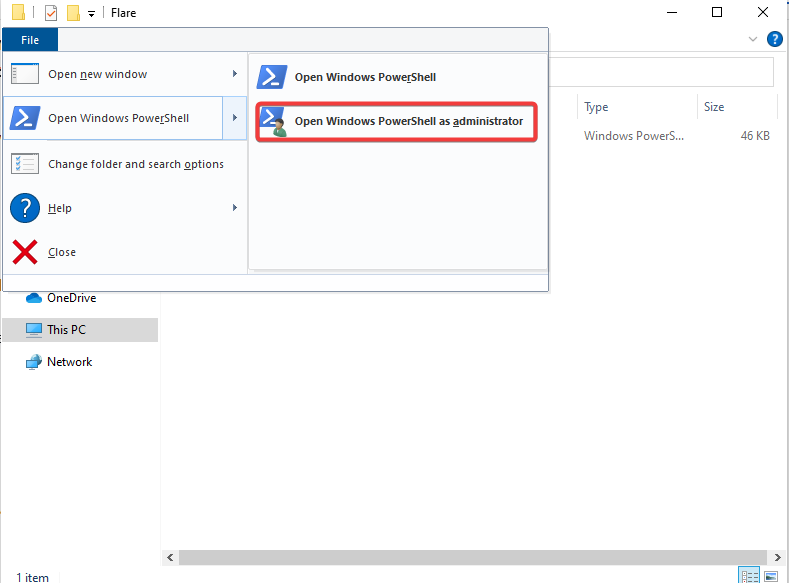
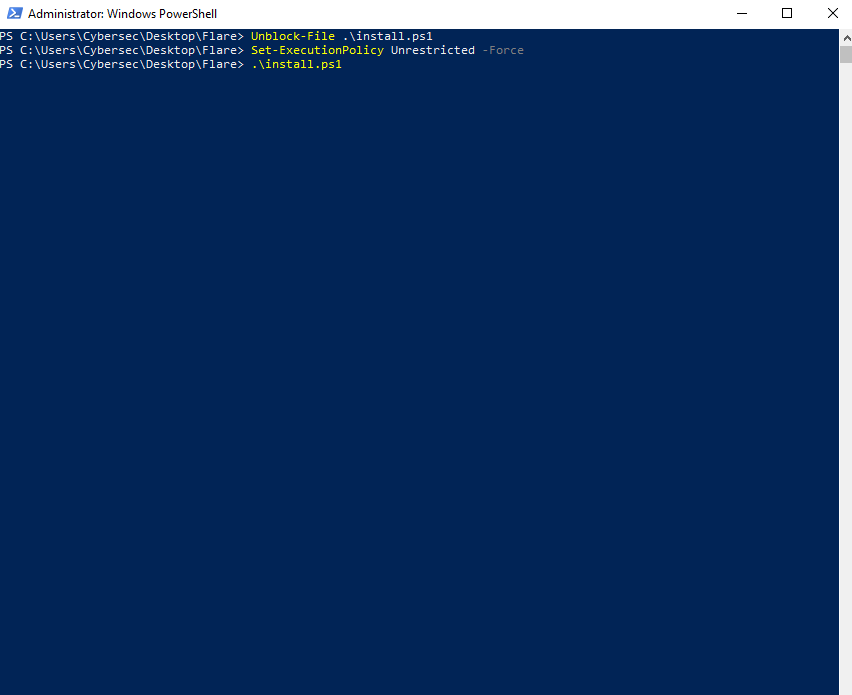
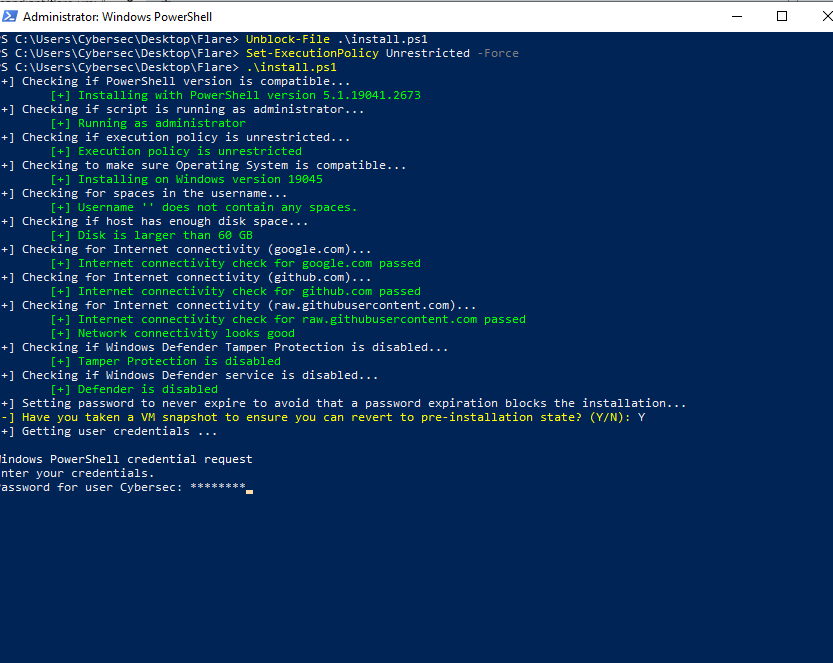
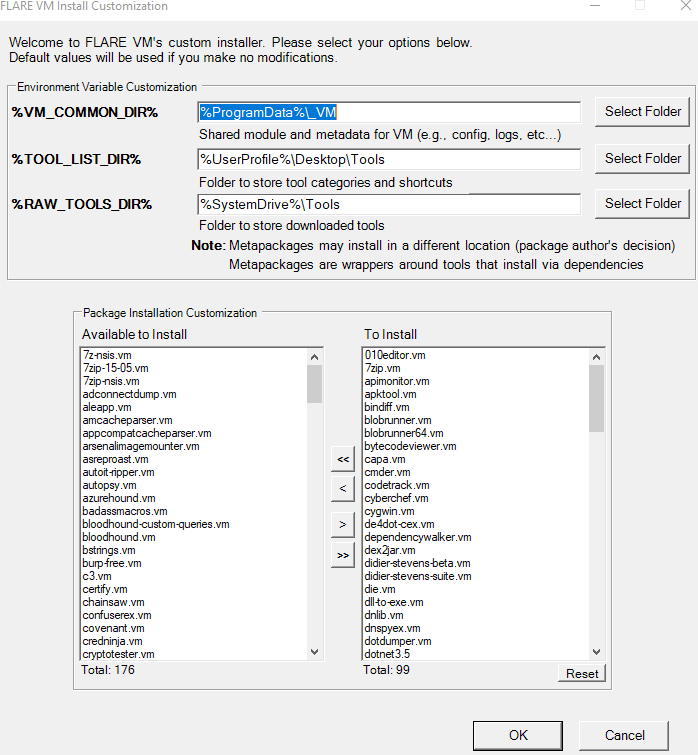
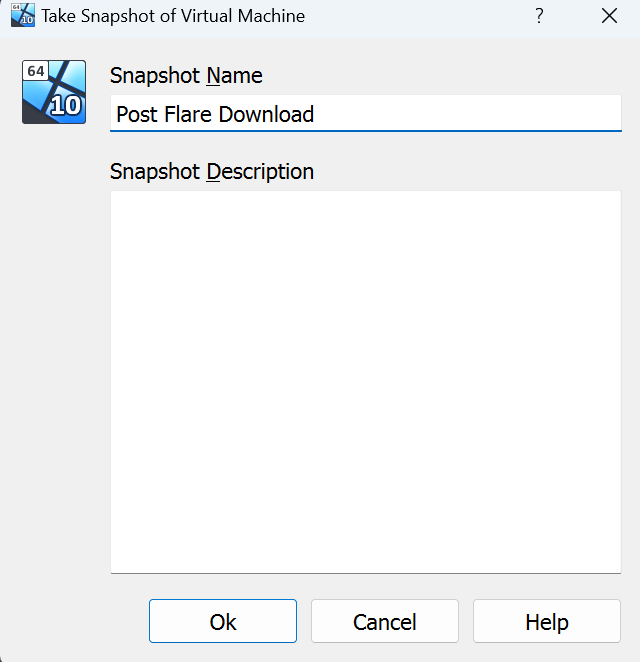
On chrome/edge search up “Flare VM Github” >> Select “Mandiant/Flare-VM” >> Head down to “Flare-VM Installation” >> Download “installer.ps1” by right clicking it and “Save as” >> Create a folder (Name: Flare) on your desktop and save it in there >> Head to File Explorer >> click on file >> Open Windows Powershell >> Run as administrator >> In powershell run these commands in order (Unblock-File .\install.ps1) (Set-ExecutionPolicy Unrestricted -Force) (.\install.ps1) >> Quickly create a Screen Shot if you want >> Let it install by putting in your password >> When the FlareVM Installation Customization screen pops up leave everything default >> Once done create another screenshot

Installing & Setting up RemNux
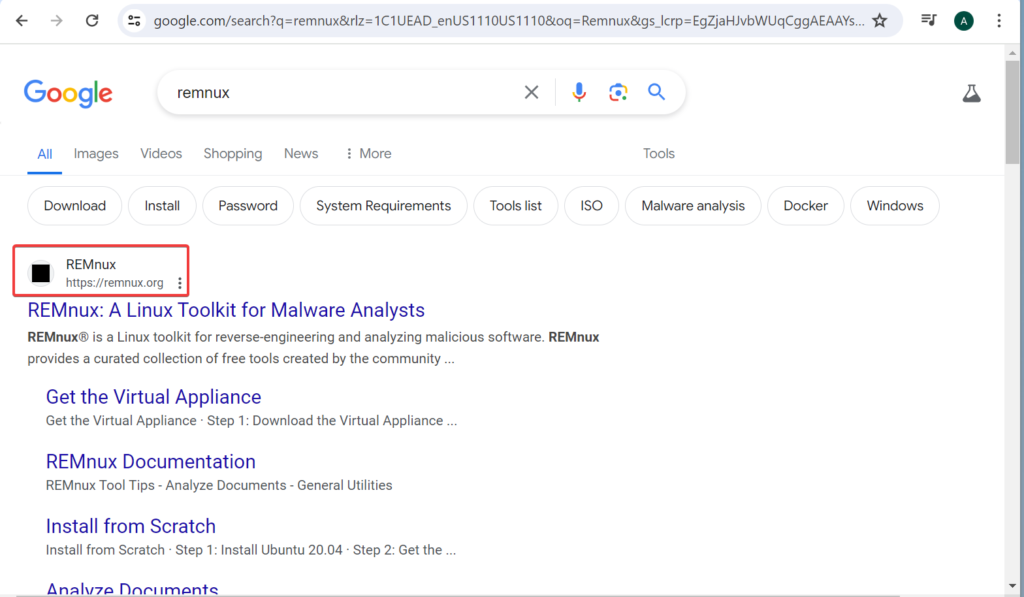
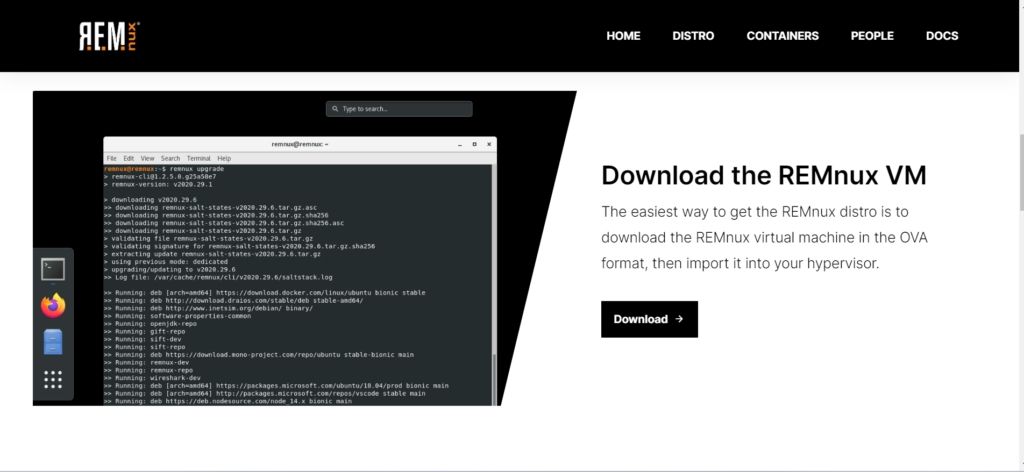
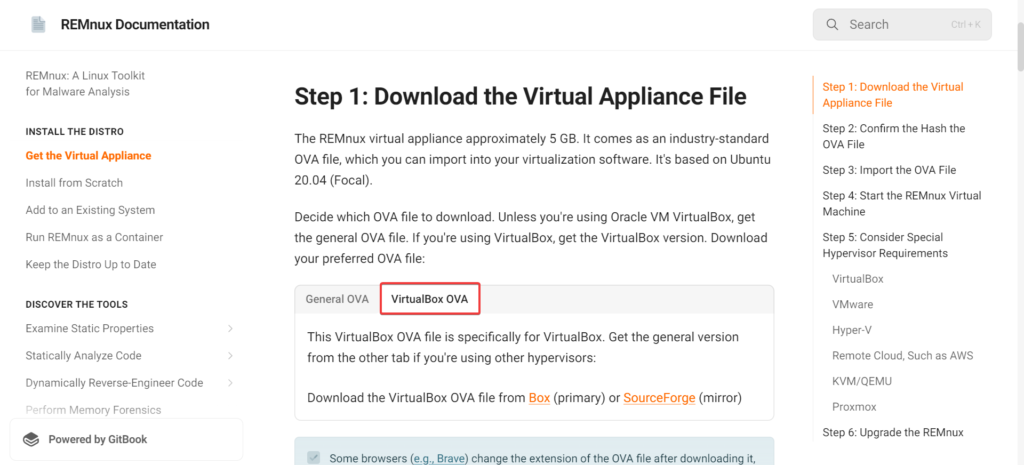
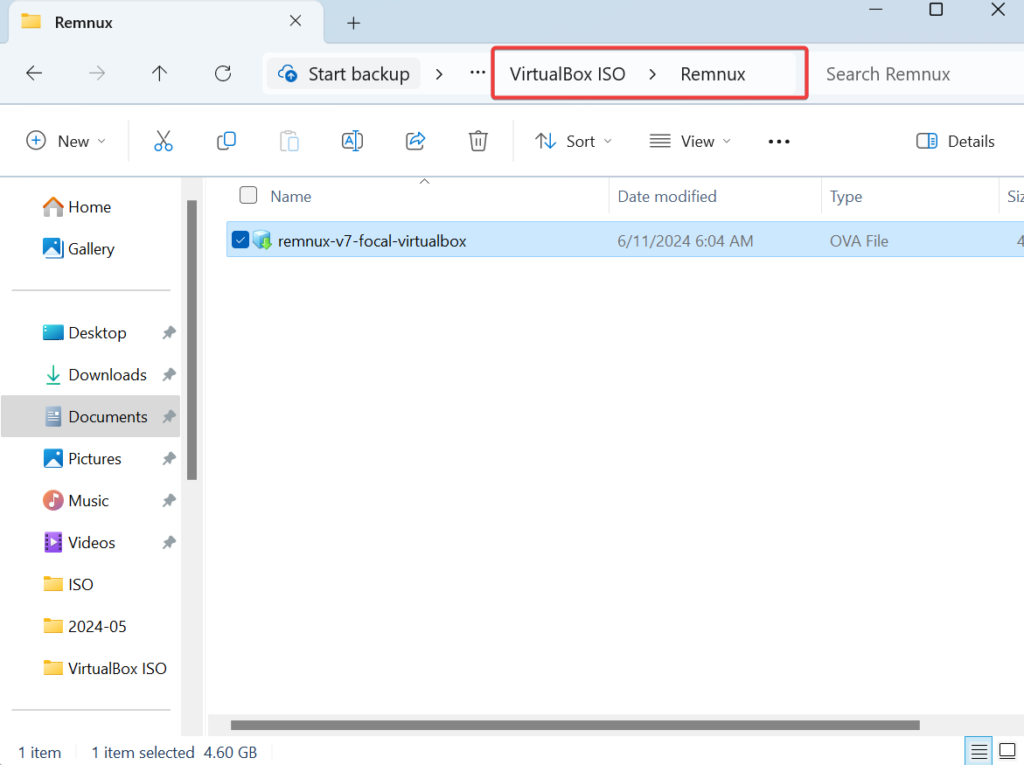
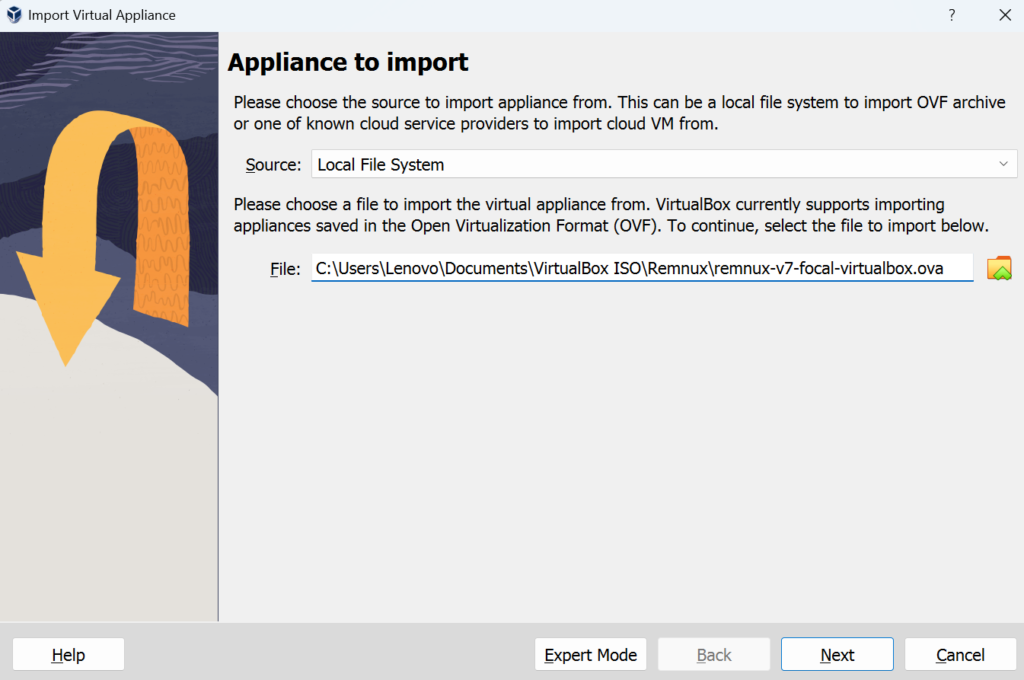
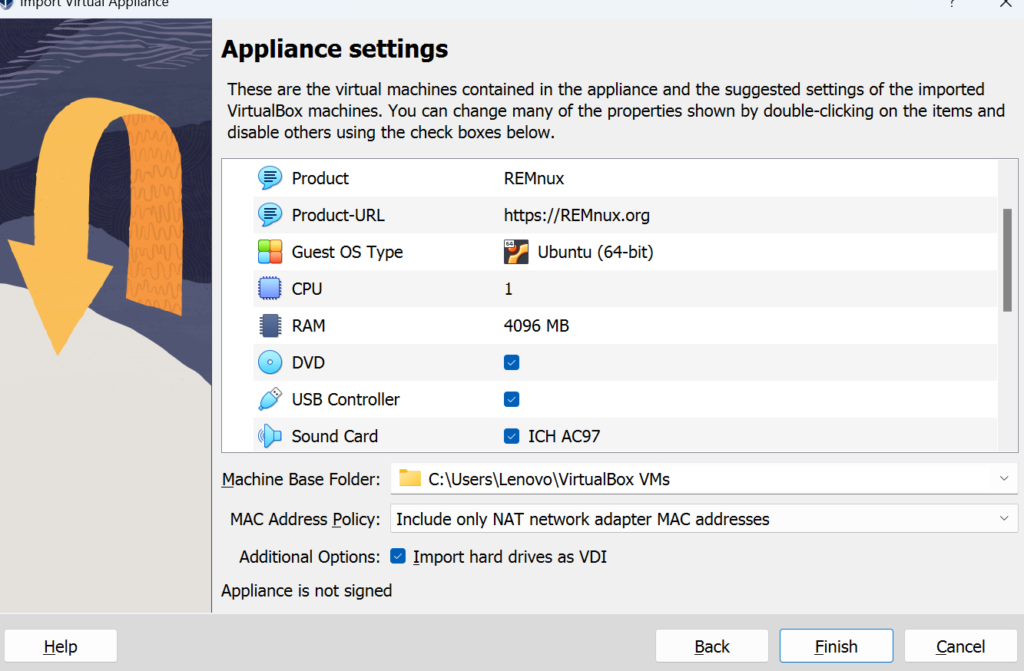
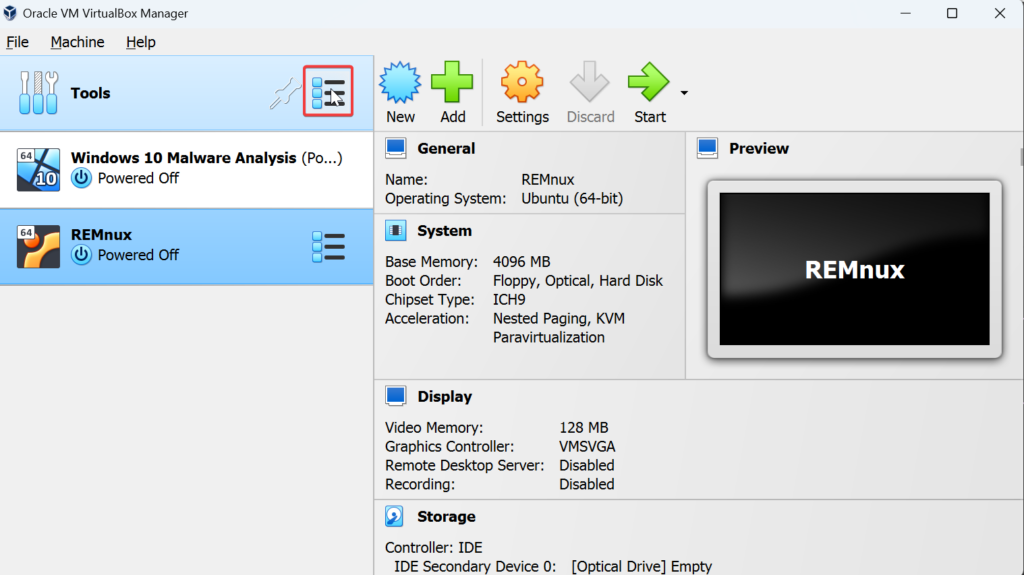
Go to Remnux.org & Download the virtualbox .ova >> Create a folder called Rem & save the download in there >> Start virtualbox >> File >> Import appliance >> Insert remnux.ova file >> Finish > Start it up
Setting up the Analysis Network
This network will be built to isolate these VMS from your main network since we are currently using NAT. Always make sure to be off your actual network when executing malware.
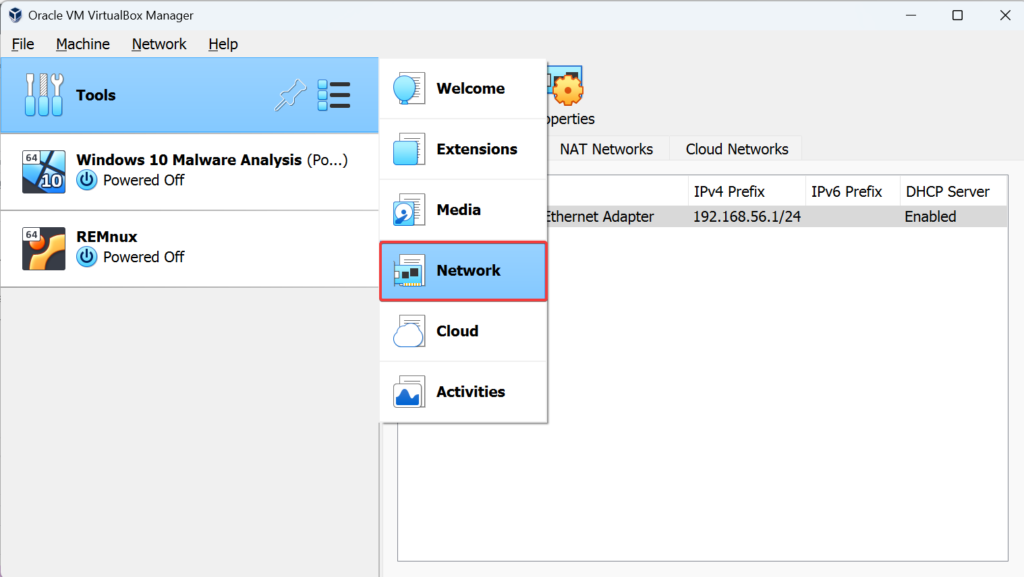
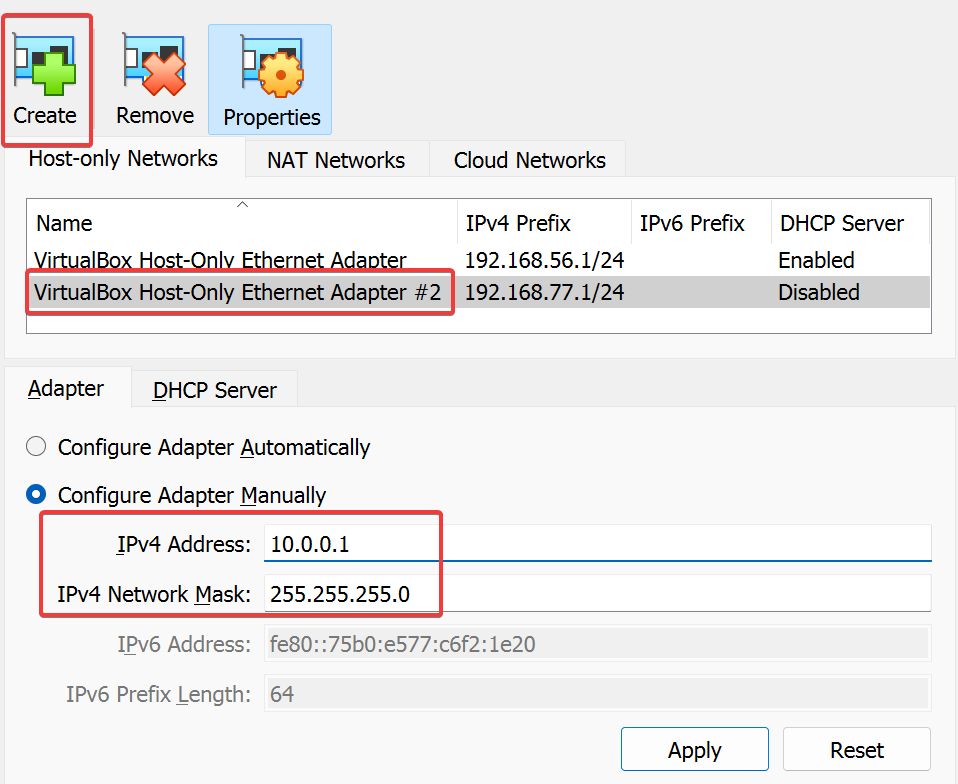
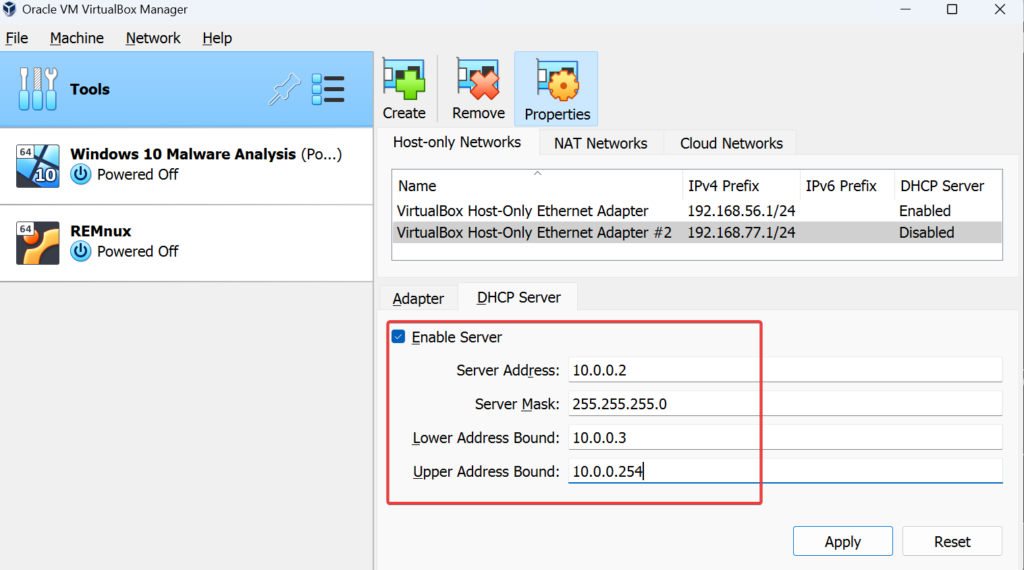
Right click the options >> Create a new adapter >> Adapter settings >> Change the IP address to 10.0.0.1 >> Enable DHCP Server >> Server Address (10.0.0.2) Lower Address bound (10.0.0.3) Upper Address bound (10.0.0.254) >> Apply
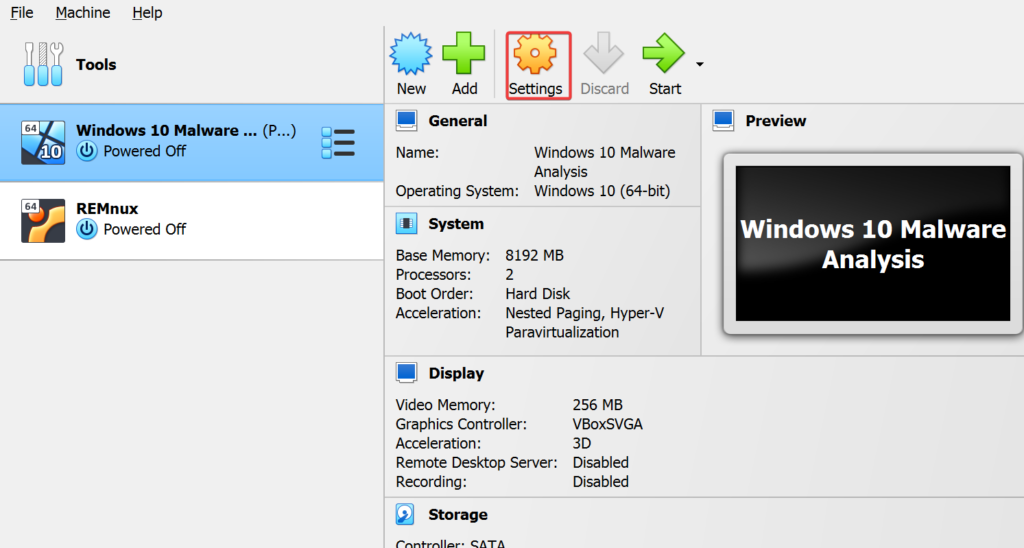
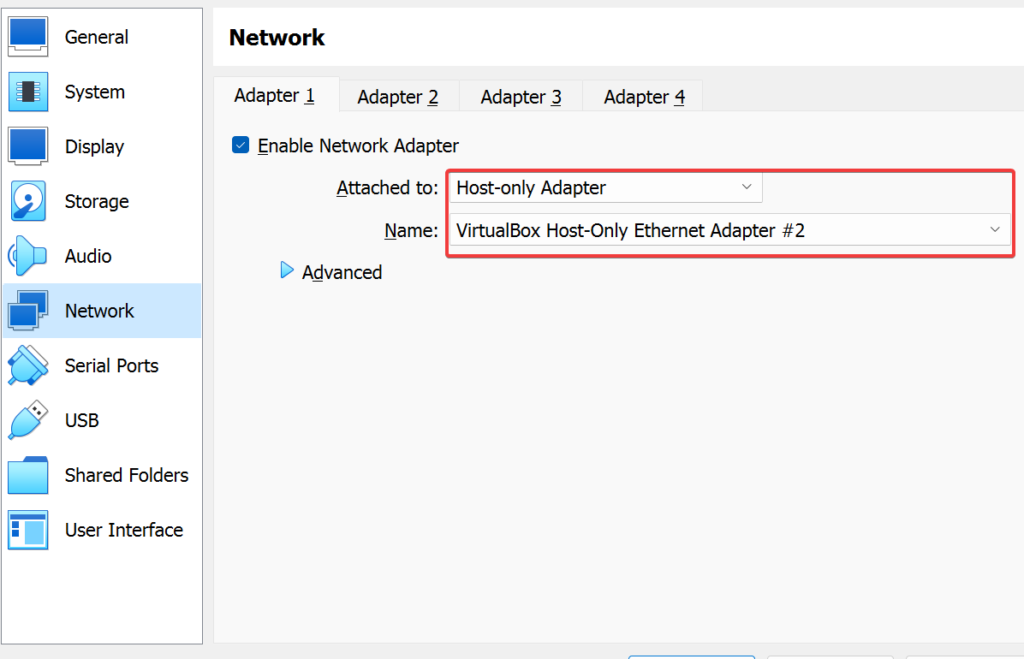
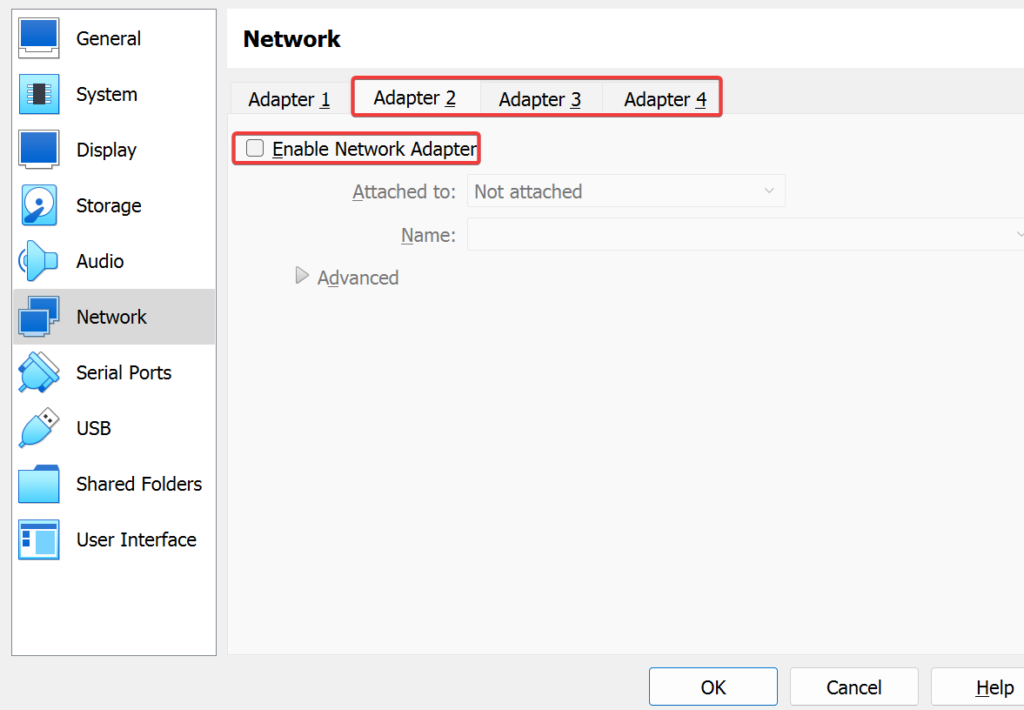
Now go to both Flare-VM & Remnux settings >> Network >> Change “Attached to: Host-only adapter” >> Check “Name: Ethernet adapter 2” >>vCheck that every other adapter is not on >> Ok
Setting up INetSim in RemNux
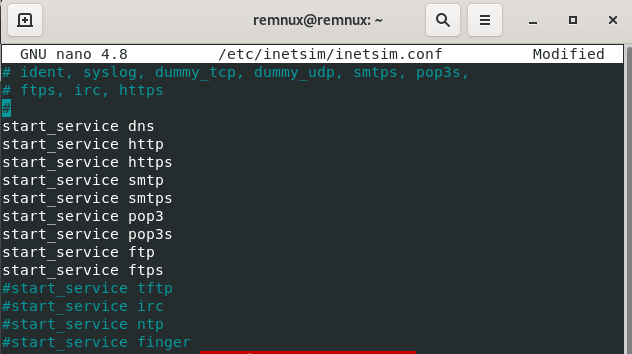
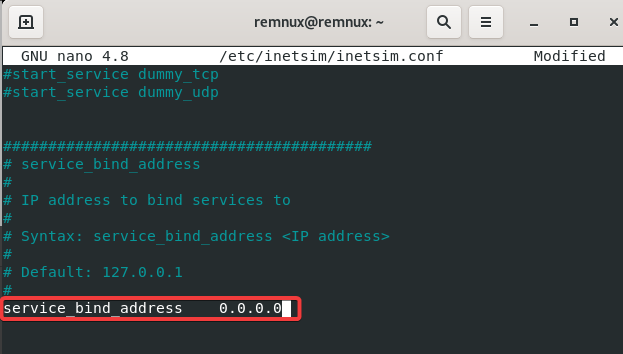
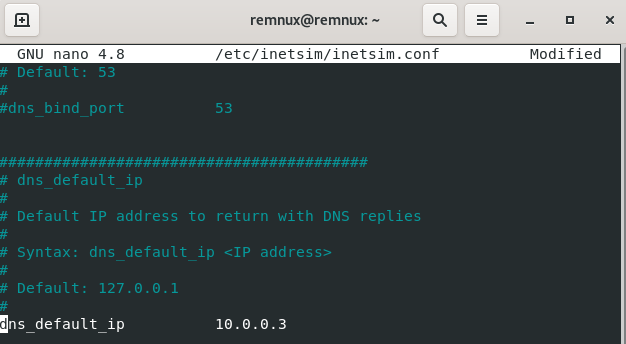
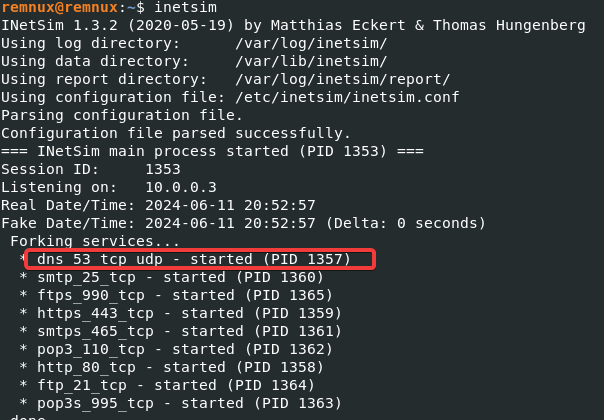
Start up Remnux >> In the command line type in (sudo nano /etc/inetsim/inetsim.conf >> Scroll down till you see “start_service dns” and take out the “#” and make sure “dns” to “ftps” do not have a “#” >> Scroll down an uncomment (take away #) “service_bind_address 10.0.0.1” (Note: Make sure it’s the one with the IP address) >> Change the IP address to the 0.0.0.0 >> Scroll down to “dns_default_ip” & change the IP Address to 10.0.0.3 (Remnux IP) >> Press ctrl + o >> Press Enter >> Press ctrl + x (saves and closes the conf) >> In the command line run (inetsim) to check it was configured right “DNS” should be in there

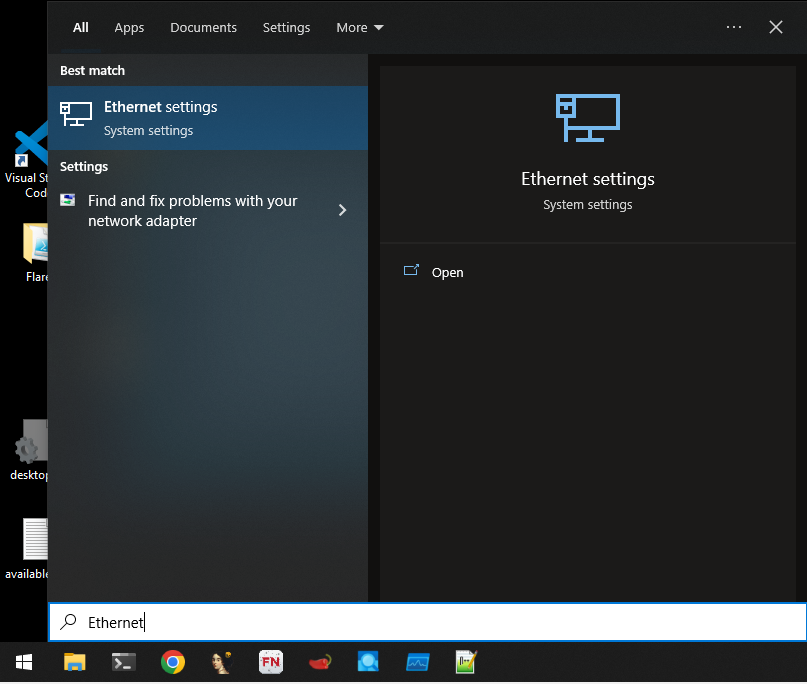
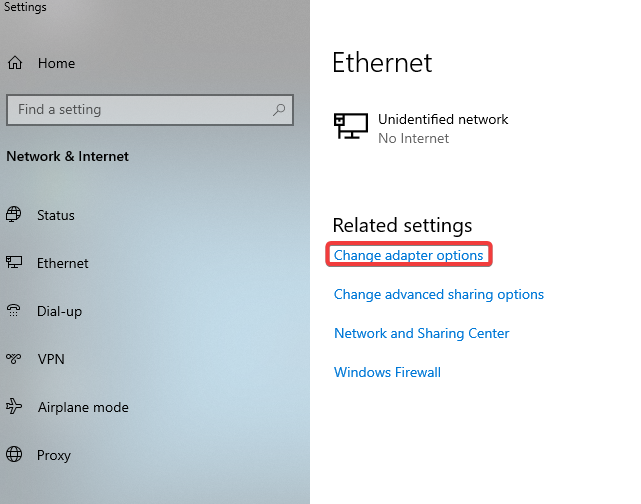
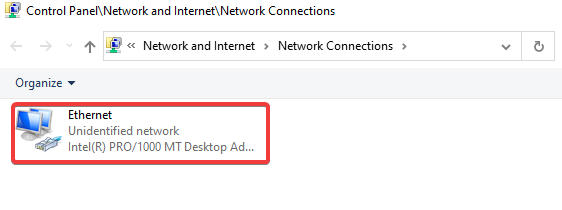
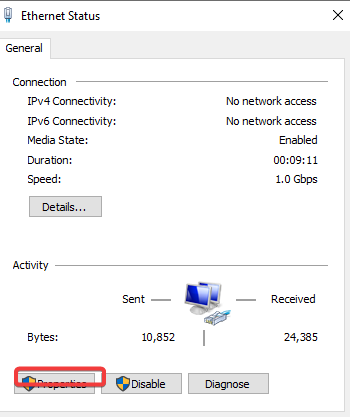
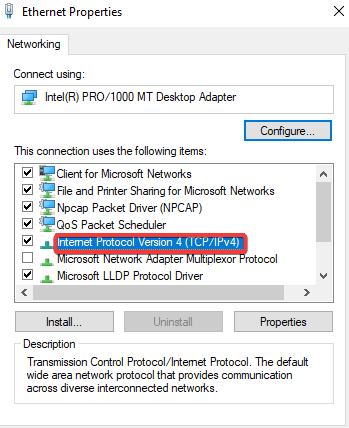
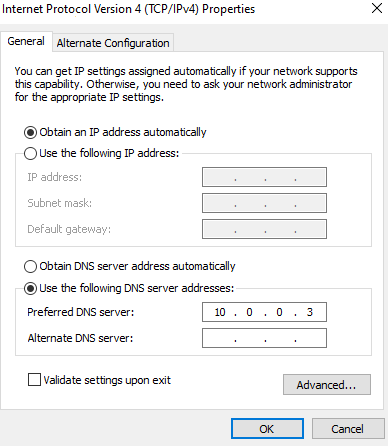
In the Flare-VM click the start button on the bottom left >> Type in Ethernet settings and click it >> Click on change adapter options >> Click on ethernet >> Properties >> Click on TCP/IPv4 >> Change DNS to (10.0.0.3) >> Ok >> OK >> Close
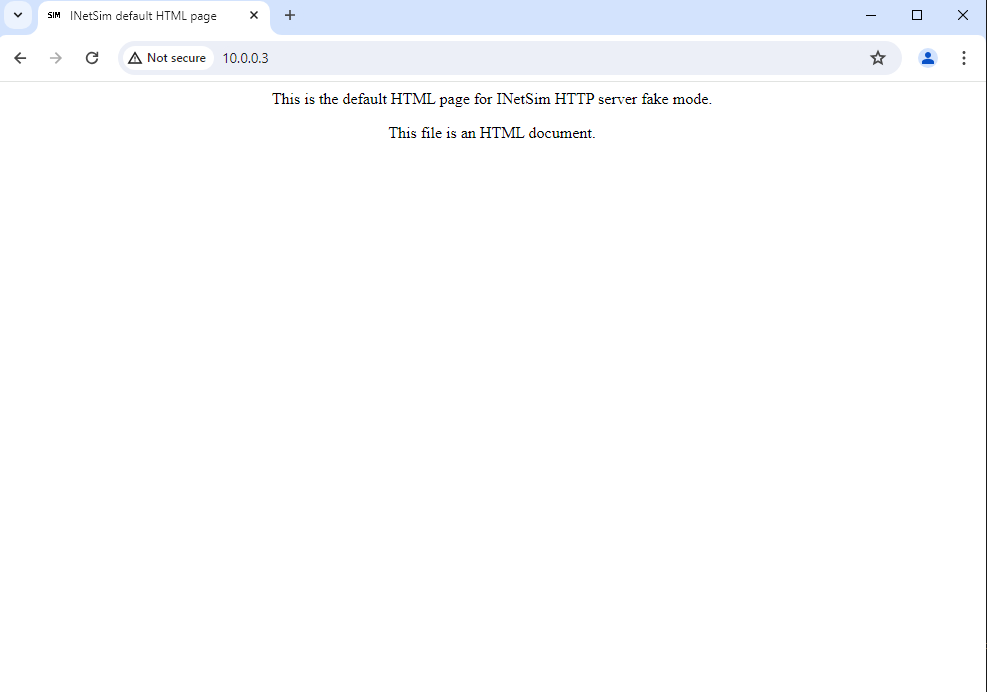
Go to chrome in the url in the vm type in (10.0.0.3) >> Should pull up a fake website which will be used incase some malware second phase installation needs to reach the internet
Conclusion
Do NOT connect this VM to your network when detonating malware.
I will be making another segment on using this lab for Static and Dynamic malware analysis.
I hope you enjoyed this lab.
